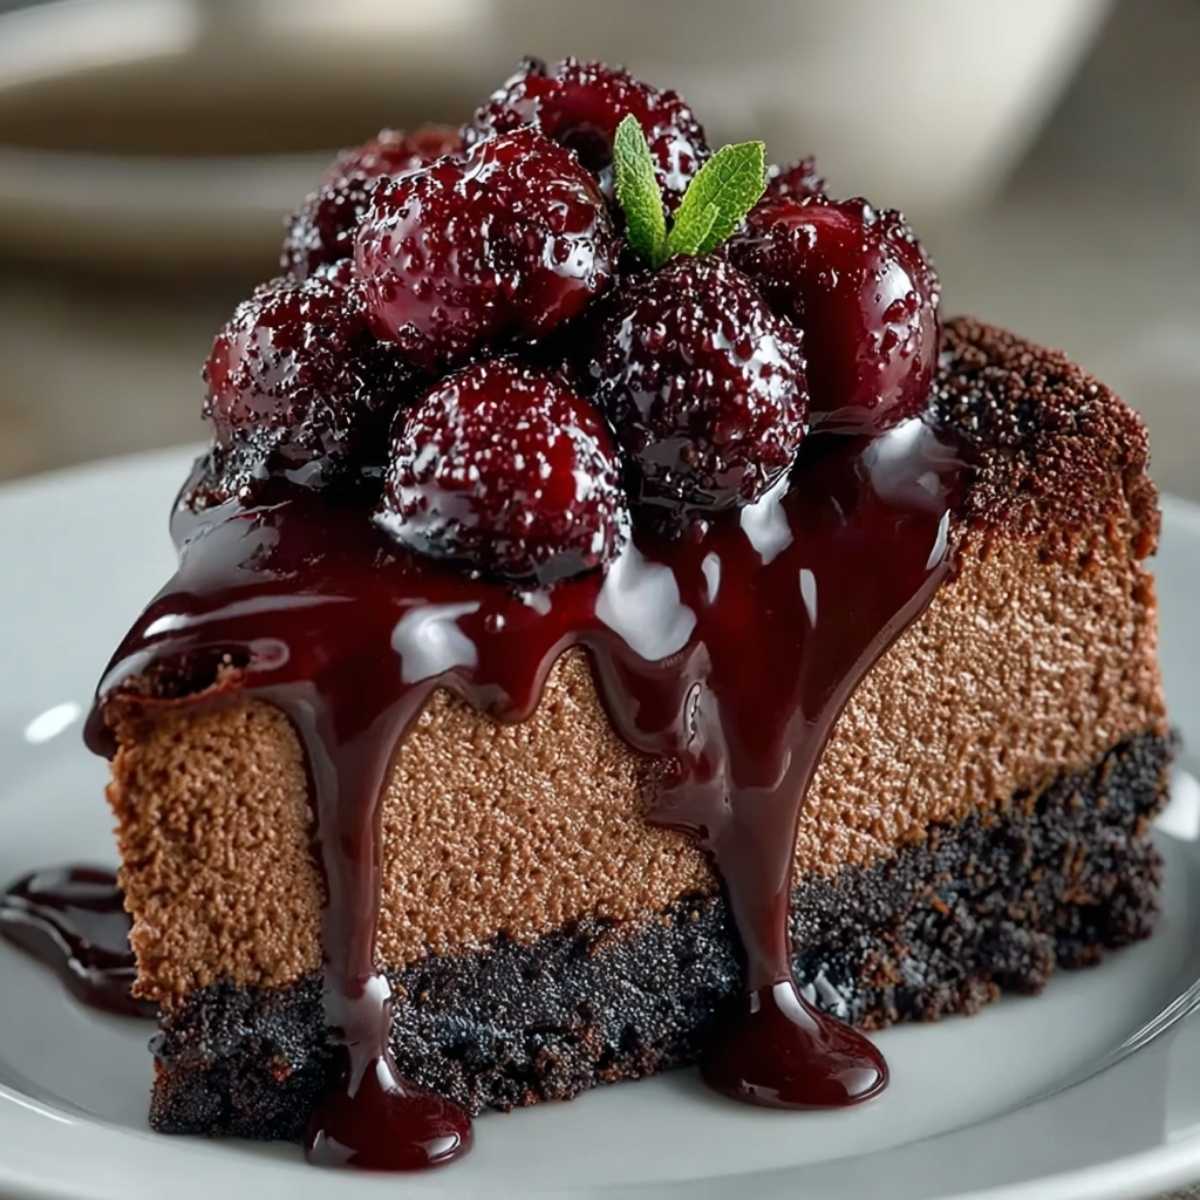
When you need a dessert that speaks the language of pure indulgence and sophisticated flavor, this Dark Chocolate Cherry Cheesecake delivers everything you could possibly desire in one stunning, restaurant-quality creation. This isn’t just another cheesecake recipe – it’s a rich, almond-flavored cheesecake that combines the deep, luxurious taste of dark chocolate with the bright, tart sweetness of fresh cherries in the most elegant way possible. The combination of chocolate cookie crust, ultra creamy chocolate cheesecake filling, and gorgeous cherry topping creates that perfect balance of flavors that makes this a decadent holiday dessert worthy of the most special occasions.
This dark chocolate cherry cheesecake recipe transforms simple ingredients into something absolutely spectacular. Made with a cookie crust, rich chocolate ganache, and cherry pie filling topping, this philadelphia dark chocolate cherry cheesecake delivers those beloved black forest cheesecake flavors that make every bite feel like pure celebration and indulgence.
Jump To
Why You’ll Love This Easy Dark Chocolate Cherry Cheesecake
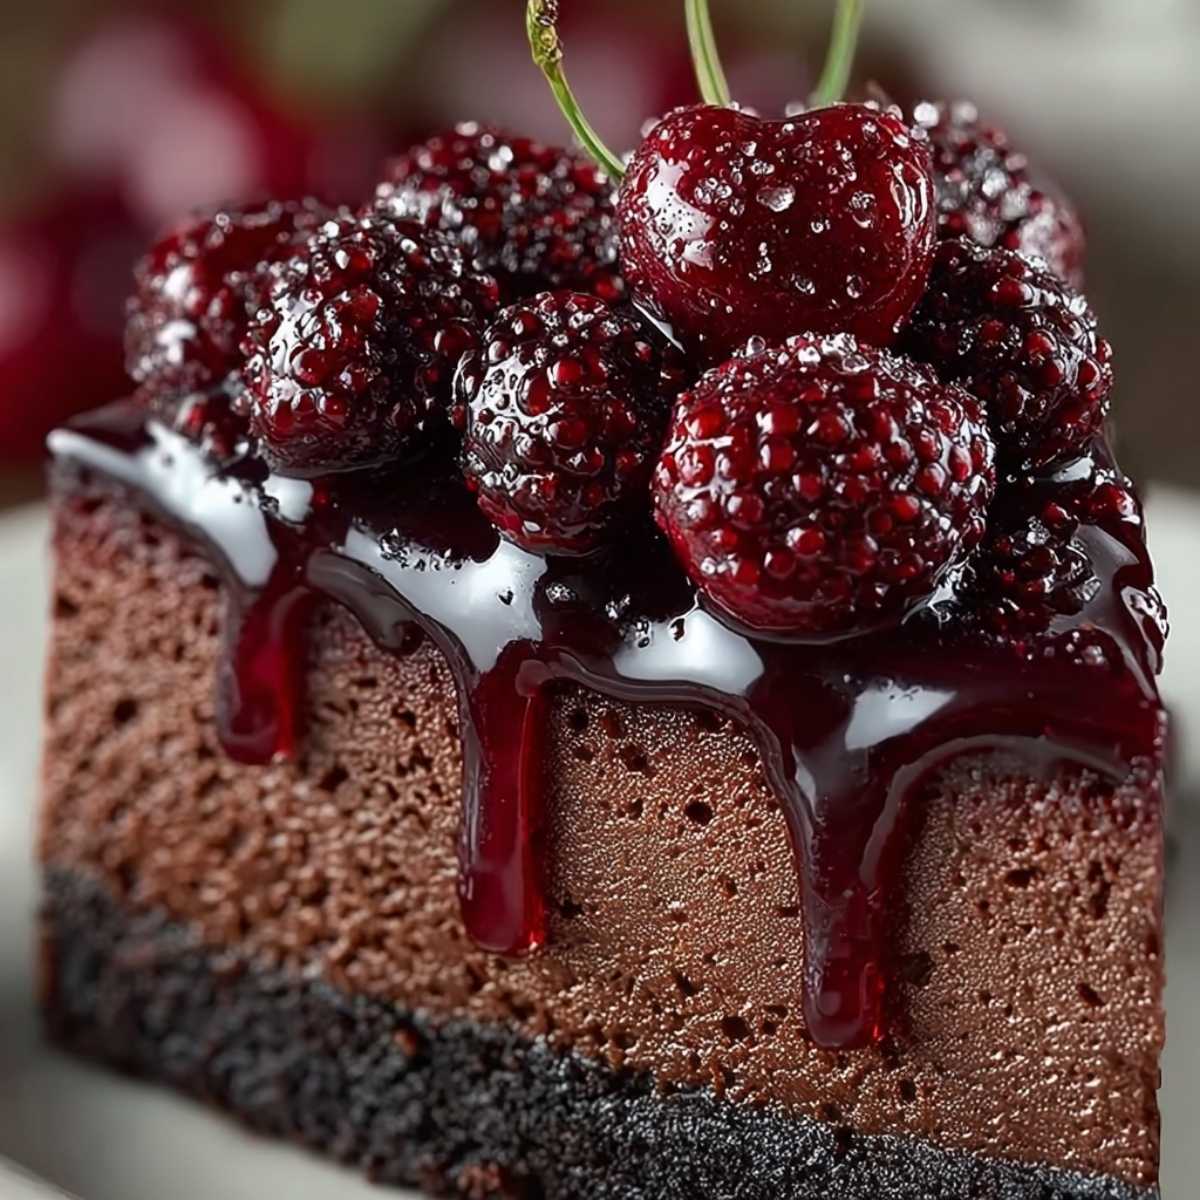
This best dark chocolate cherry cheesecake delivers that incredible combination of rich, velvety chocolate and bright, juicy cherries that creates one of the most beloved flavor pairings in all of dessert making. The creamy cheesecake filling provides that signature tangy richness we all crave, while the chocolate cookie crust adds textural contrast and deep cocoa flavor that complements the filling perfectly. Each slice delivers layers of indulgent flavor – from the buttery chocolate crust to the silky cheesecake center, finished with that gorgeous fresh sweet cherries or cherry pie filling topping.
What really sets this cheesecake factory chocolate cherry cheesecake inspired recipe apart is how it captures all the elegance and sophistication of restaurant-quality desserts while being surprisingly manageable for home bakers. This springform pan cheesecake technique ensures perfect results every time, while the water bath baking method creates that signature silky texture without cracks or imperfections. The chocolate shavings garnish adds professional presentation that makes this perfect for special occasions or any time you want to create something truly memorable.
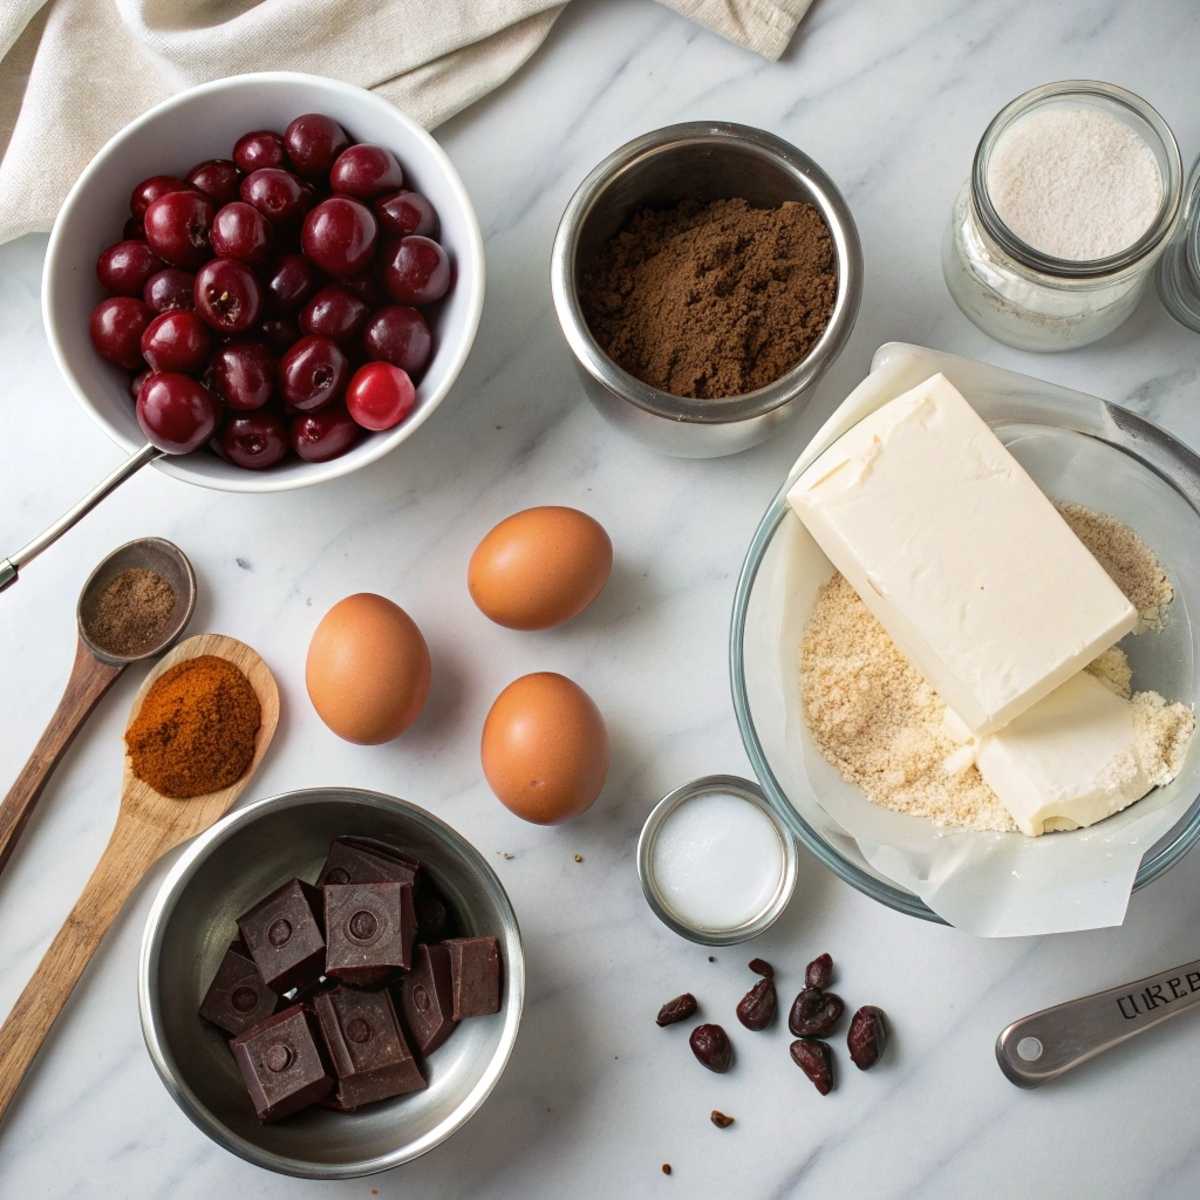
Ingredients for Dark Chocolate Cherry Cheesecake
This philadelphia dark chocolate cherry cheesecake recipe focuses on premium ingredients that create authentic, restaurant-quality flavors. The key is using quality dark chocolate and cream cheese for that signature taste and texture combination.
What You’ll Need
For the Chocolate Cookie Crust:
- 1 1/2 cups chocolate cookie crumbs (Oreos work great)
- 1/4 cup melted butter
- 2 tablespoons granulated sugar
For the Chocolate Cheesecake Filling:
- 24 oz cream cheese, softened
- 3/4 cup granulated sugar
- 3 large eggs
- 1/4 cup sour cream
- 6 oz dark chocolate, melted and cooled
- 1 teaspoon vanilla extract
- 1/4 teaspoon almond extract
For the Cherry Topping:
- 2 cups fresh sweet cherries, pitted (or 1 jar cherry pie filling)
- 1/4 cup granulated sugar (if using fresh cherries)
- 2 tablespoons cornstarch (if using fresh cherries)
- 1 tablespoon lemon juice
- Rich chocolate ganache for drizzling (optional)
Why These Ingredients Matter
Room temperature cream cheese is absolutely crucial for smooth, lump-free filling – cold cream cheese will create a grainy texture no matter how long you mix it. Quality dark chocolate makes a huge difference in the final flavor – choose something with at least 60% cocoa for the best results. The combination of vanilla and almond extracts creates that signature flavor depth that makes this taste professionally made. Fresh cherries provide the best flavor and texture, though good-quality cherry pie filling is a convenient alternative that still delivers delicious results.
Instructions for Making Dark Chocolate Cherry Cheesecake
Step-by-Step Directions
Step 1: Preheat oven to 325°F and wrap bottom of 9-inch springform pan with foil to prevent leaks.
Step 2: Combine chocolate cookie crumbs, melted butter, and sugar. Press firmly into bottom of prepared pan.
Step 3: Bake crust for 8-10 minutes, then remove and cool while preparing filling.
Step 4: Beat cream cheese until smooth and fluffy, about 3 minutes, scraping bowl frequently.
Step 5: Gradually add sugar, beating until well combined.
Step 6: Add eggs one at a time, beating just until incorporated after each addition.
Step 7: Mix in sour cream, melted chocolate, vanilla, and almond extract until just combined.
Step 8: Pour filling over prepared crust and smooth top.
Step 9: Place springform pan in larger roasting pan and add hot water halfway up sides.
Step 10: Bake in water bath for 55-65 minutes until center is almost set but still slightly jiggly.
Step 11: Turn off oven, crack door open, and let cool in oven for 1 hour.
Step 12: Remove from water bath and cool completely, then refrigerate at least 4 hours or overnight.
Step 13: Before serving, prepare cherry topping by cooking fresh cherries with sugar, cornstarch, and lemon juice until thickened, or simply warm cherry pie filling.
Step 14: Top chilled cheesecake with cherry mixture and chocolate ganache if desired.
Hint: Don’t skip the water bath – this is what prevents cracks and creates that signature silky texture! The gentle, even heat is essential for perfect cheesecake results. Also, let it cool gradually to prevent cracking. For another rich chocolate dessert, try these easy Oreo cupcakes when you want something equally indulgent but individual-sized.
Top Tip
The secret to perfect dark chocolate cherry cheesecake is temperature control throughout the entire process. Make sure all dairy ingredients are at room temperature for smooth mixing, and don’t overbeat once you add the eggs – this can incorporate too much air and cause cracking. The melted chocolate should be cooled to room temperature before adding to prevent it from seizing when it hits the cold cream cheese.
Watch for visual cues rather than relying solely on time – the center should still have a slight jiggle when you remove it from the oven as it will continue to set during the cooling process. The gradual cooling in the turned-off oven is crucial for preventing surface cracks. When cutting, use a sharp knife dipped in warm water and wiped clean between slices. For another elegant dessert with similar sophisticated flavors, this red velvet cream cheese bundt cake offers different but equally impressive results.
My Dark Chocolate Cherry Cheesecake Story
I’ll never forget the Valentine’s Day I decided to surprise my husband with something more elaborate than our usual homemade dinner. I’d seen this gorgeous chocolate cherry cheesecake in a bakery window and was determined to recreate it at home, despite having never attempted anything so ambitious. What I didn’t anticipate was how nerve-wracking it would be waiting to see if all those technique details actually mattered.
When I finally removed that beautiful creation from the springform pan and saw the perfect, crack-free surface topped with those jewel-like cherries, I felt like I’d conquered the world of dessert making. Grandma took one look and said, “Jazzy, you’ve learned that the most beautiful gifts come from taking on something that scares you a little.” She was absolutely right, and this cheesecake taught me that restaurant-quality desserts are absolutely achievable with patience and attention to detail.
Substitutions for Dark Chocolate Cherry Cheesecake
If you need to adapt this chocolate cherry cheesecake recipe for different needs, here are swaps that work well:
- Dark chocolate – semi-sweet chocolate works but the flavor will be sweeter and less intense
- Fresh cherries – frozen cherries work if thawed and drained, or try other berries for different flavors
- Chocolate cookie crust – graham cracker crust works for different flavor profile
- Sour cream – Greek yogurt provides similar tang and creaminess
- Almond extract – skip if you prefer pure vanilla flavor, or use cherry extract for extra fruit flavor
For a no bake dark chocolate cherry cheesecake version, use gelatin to set the filling and skip the baking process entirely. The beauty of cheesecake is how adaptable the basic technique is to different flavors and dietary needs. For another dessert that plays with chocolate and fruit beautifully, this rose pistachio cheesecake ice cream offers similar elegance with different flavors.
Variations on Dark Chocolate Cherry Cheesecake
This cherry chocolate cheesecake base is perfect for so many delicious variations:
- Black Forest Style – add whipped cream layers and chocolate shavings for authentic German cake inspiration
- Individual Portions – make as chocolate cherry cheesecake bites in mini muffin tins
- White Chocolate – substitute white chocolate for a milder, sweeter flavor profile
- Boozy Version – add kirsch or cherry brandy to the filling for adult sophistication
- Mixed Berry – combine cherries with raspberries and blackberries for variety
- Chocolate Ganache Top – cover entirely with chocolate ganache for ultimate indulgence
Each variation keeps that signature rich chocolate and tart cherry combination while giving you different presentation and flavor options.
Equipment for Dark Chocolate Cherry Cheesecake
The right tools make this sweets treats project so much easier:
- 9-inch springform pan – absolutely essential for easy removal and clean presentation
- Stand mixer or hand mixer – crucial for smooth, lump-free filling
- Large roasting pan – for the water bath that prevents cracking
- Food processor – helpful for making perfect cookie crumb crust
- Double boiler or microwave – for melting chocolate smoothly without burning
If you don’t have a springform pan, you can use a regular cake pan lined with parchment, though removal will be much more challenging with this delicate dessert.
Storage Tips for Dark Chocolate Cherry Cheesecake
This cream cheese recipes masterpiece stores beautifully for special occasions:
- Refrigerator – store covered for up to 5 days (flavors improve after day 2)
- Freezer – freeze whole cheesecake for up to 2 months, thaw in refrigerator overnight
- Serving – remove from fridge 30 minutes before serving for best texture
- Individual slices – wrap tightly for easy portion control and gift giving
- Topping timing – add cherry topping just before serving to prevent soggy crust
This is one of those desserts that actually benefits from overnight chilling, making it perfect for make-ahead entertaining and special occasions.
Grandma’s Secret for Dark Chocolate Cherry Cheesecake
Grandma always runs her knife around the edge of the cheesecake while it’s still warm to prevent the top from cracking as it cools. “Jazzy, giving it room to shrink naturally keeps everything smooth and beautiful,” she’d explain while carefully loosening the edges with practiced precision.
Look at this gorgeous cheesecake with its rich chocolate layers and beautiful cherry crown – pure decadent elegance that rivals any fancy restaurant dessert!
FAQ about Dark Chocolate Cherry Cheesecake
Is it better to bake or not bake a cheesecake?
Both methods work well, but baked cheesecakes tend to have a richer, more traditional texture and flavor. No-bake versions are easier and quicker but have a lighter, mousse-like texture rather than the dense creaminess of baked cheesecake.
What is the secret to making good cheesecake?
Room temperature ingredients, gentle mixing (don’t overbeat), water bath baking, and gradual cooling are the keys. Also, don’t overbake – the center should still jiggle slightly when you remove it from the oven.
What is black forest cheesecake?
Black forest cheesecake is inspired by the German Black Forest cake, typically featuring chocolate and cherry flavors with whipped cream. This version captures those same flavors in cheesecake form with chocolate filling and cherry topping.
Conclusion
This Dark Chocolate Cherry Cheesecake represents the perfect fusion of two timeless flavors, creating something that feels both luxurious and comfortingly familiar at the same time. The rich chocolate and bright cherry combination delivers that perfect balance of indulgence and freshness that makes every bite feel like a special celebration. For another breakfast treat that pairs beautifully with rich desserts, try this Belgian waffle recipe when you want to create a complete brunch spread. If you’re looking for more decadent chocolate dessert inspiration, this chocolate turtles cheesecake offers additional techniques and flavor combinations to explore.
The beauty of mastering this sophisticated dessert is knowing you can create restaurant-quality results that will leave everyone at your table completely impressed and asking for the recipe, turning any ordinary meal into an extraordinary memory.
Grandma’s Dark Chocolate Cherry Cheesecake
Equipment
- 1 9-inch springform pan Grandma insisted on this! It's the secret to getting it out perfectly.
- 1 Stand mixer or hand mixer Essential for that signature smooth, lump-free filling.
- 1 Large roasting pan For the water bath. Don't skip this!
- 1 Food processor Makes getting those cookie crumbs perfectly fine so much easier.
- 1 Double boiler or microwave For melting the chocolate gently.
Ingredients
For the Chocolate Cookie Crust:
- 1 1/2 cups chocolate cookie crumbs I always use Oreos, just like Grandma did.
- 1/4 cup melted butter
- 2 tbsp granulated sugar
For the Chocolate Cheesecake Filling:
- 24 oz cream cheese Softened to room temperature. This is non-negotiable!
- 3/4 cup granulated sugar
- 1/4 cup sour cream
- 6 oz dark chocolate Melted and cooled slightly.
- 1 tsp vanilla extract
- 1/4 tsp almond extract Grandma's secret ingredient for depth of flavor.
For the Cherry Topping:
- 2 cups fresh sweet cherries, pitted Or one 21 oz can of cherry pie filling in a pinch.
- 1/4 cup granulated sugar Omit if using canned pie filling.
- 2 tbsp cornstarch Omit if using canned pie filling.
- 1 tbsp lemon juice
Instructions
- Let's get everything ready, just like Grandma taught me. First, preheat your oven to 325°F (165°C). Then, take your [9-inch springform pan] and wrap the bottom and sides securely with a large sheet of heavy-duty aluminum foil. This is our insurance policy to keep the water bath out!
- In a small bowl, mix together the [chocolate cookie crumbs], [melted butter], and 2 tablespoons of [granulated sugar]. It should feel like wet sand. Press this mixture firmly and evenly into the bottom of your prepared pan.
- Pop the crust into the oven and bake for 8-10 minutes. This little step makes sure the crust stays crisp. Once it's done, set it on a wire rack to cool while we make the magic happen with the filling.
- In the bowl of your [stand mixer], beat the softened [cream cheese] on medium speed for about 3 minutes until it's completely smooth and has no lumps. I can still hear Grandma saying, "Jazzy, scrape that bowl! Don't leave any flavor behind."
- With the mixer on low, gradually add the 3/4 cup of [granulated sugar] and mix until it's just combined. Now, add the [eggs], one at a time, mixing on low speed just until the yellow disappears after each one. Grandma's biggest rule: "Don't whip the eggs! That's how you get cracks."
- Gently mix in the [sour cream], cooled [melted dark chocolate], [vanilla extract], and that special [almond extract]. Mix on low until everything is just blended and the batter is silky smooth. Don't overdo it!
- Pour the beautiful chocolate filling over your cooled crust and smooth the top with a spatula. Place the springform pan inside the larger [roasting pan]. Carefully pour hot water into the roasting pan until it comes about halfway up the sides of your cheesecake pan.
- Carefully transfer the whole setup to the oven. Bake for 55-65 minutes. The edges should be set, but the center will still have a slight wobble to it. That's the sign of a perfect, creamy cheesecake.
- Turn the oven off, crack the door open, and let the cheesecake cool in the oven for 1 hour. This slow, gentle cooling is the final secret to a crack-free top. It was the hardest part for me as a kid, the waiting!
- Remove the cheesecake from the water bath, take off the foil, and let it cool completely on a wire rack. Then, cover it and place it in the refrigerator to chill for at least 4 hours, but overnight is truly best. This is where the flavors all meld together.
- Just before you're ready to serve, make the topping. If using fresh [cherries], combine them in a small saucepan with 1/4 cup [sugar], [cornstarch], and [lemon juice]. Cook over medium heat, stirring, until the sauce thickens and the cherries are tender. Let it cool slightly.
- Carefully run a knife around the edge of the cheesecake before releasing the springform ring. Spoon the luscious cherry topping over the chilled cheesecake. Slice, serve, and watch everyone's eyes light up. This is more than a dessert; it's a memory on a plate.
Notes
- Grandma’s No-Crack Tip: As soon as the cheesecake comes out of the oven (before it chills), carefully run a thin knife around the edge to loosen it from the pan. She swore this lets it settle without pulling and cracking the top.
- Substitutions: If you’re not a fan of chocolate crust, a classic graham cracker crust works beautifully too. You can also substitute the cherries with raspberries or a mixed berry blend.
- Storage: This cheesecake stores wonderfully! Keep it covered in the refrigerator for up to 5 days. Honestly, I think the flavor is even better on day two!