I’m going to share a kitchen secret that my grandma would have called ‘clever as can be.’ This cheese danish recipe uses our favorite magic trick: store-bought puff pastry! Making a danish with puff pastry means you get all those buttery, flaky layers you love in a fraction of the time. It’s a simple shortcut that makes this elegant pastry doable for absolutely anyone.

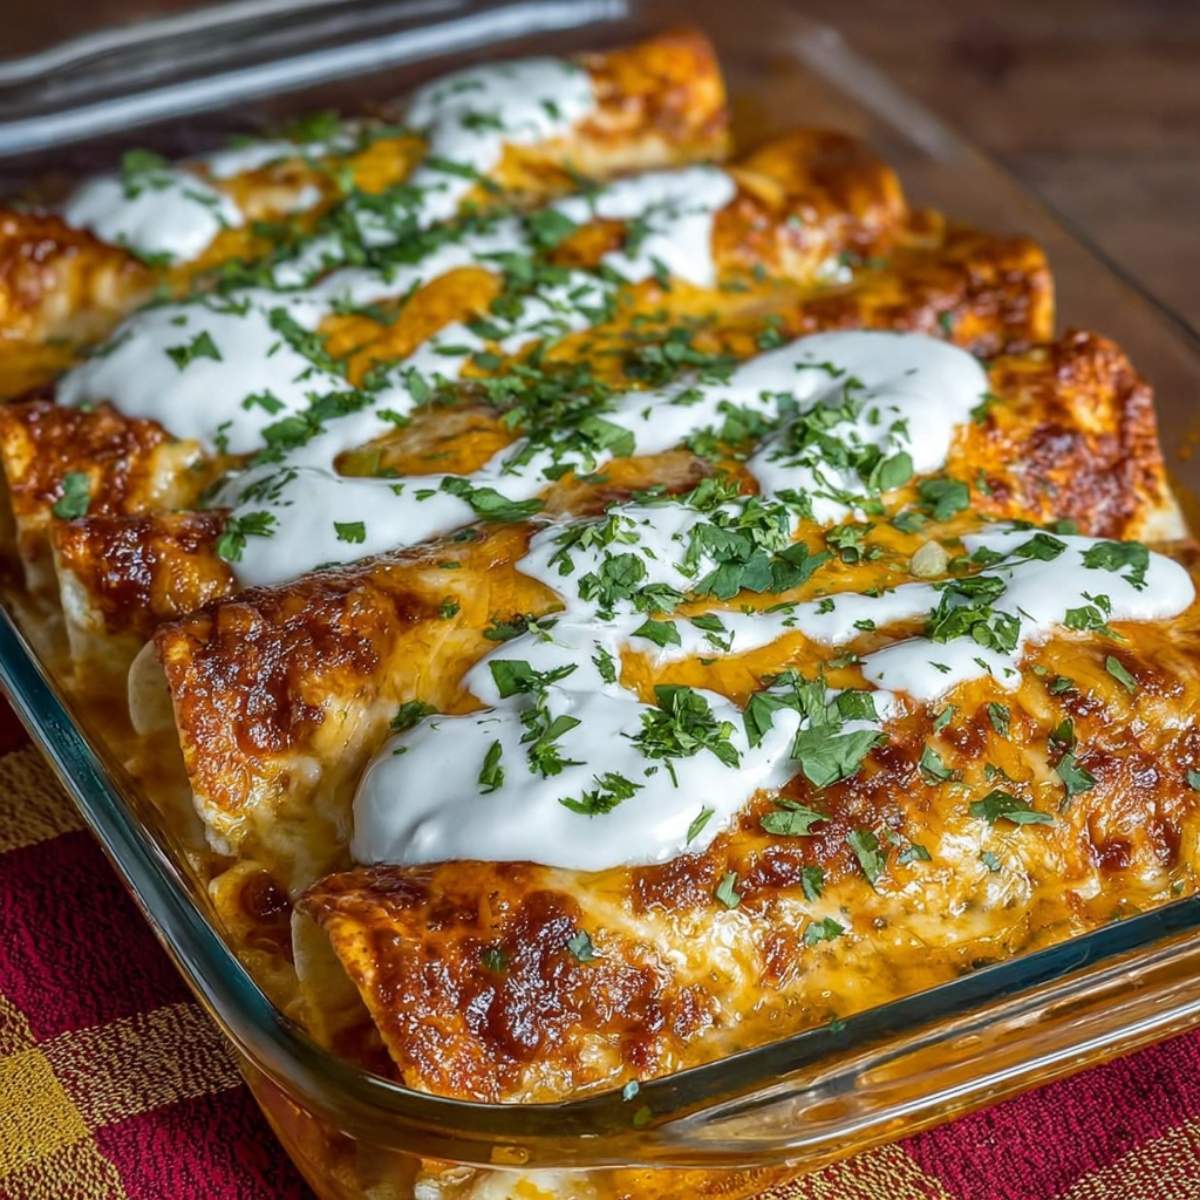
Picture golden, puffed puff pastry sheets folded around a simple cream cheese filling that’s tangy, slightly sweet, and absolutely irresistible. This homemade bakery-style treat is ridiculously easy to make and can be on your table in under a half hour, making it perfect for weekend brunches, special breakfast occasions, or whenever you’re craving something indulgent and delicious. The best part? You’ll save money compared to buying them from coffee shops while creating cheese danish pastry that tastes even better than what you’d find at your local bakery. Whether you’re looking to make copycat Starbucks cheese danishes or just want to impress your family with freshly baked pastries, this cream cheese danish recipe delivers budget-friendly elegance that everyone will love.
Jump To
Why You’ll Love This Cheese Danish
This best cheese danish recipe delivers all the buttery, flaky goodness you crave without any of the complicated pastry-making techniques that traditional recipes require. Using store-bought puff pastry makes this incredibly accessible while still creating that authentic, layered texture that makes Danish pastries so special. The cream cheese filling strikes the perfect balance between tangy and sweet, creating a flavor combination that’s absolutely addictive.
What makes this recipe truly special is how professional the results look and taste, despite being surprisingly simple to execute. The puff pastry becomes gorgeously golden and crispy while the cream cheese filling stays creamy and luscious. Each bite delivers that perfect contrast of textures that makes bakery pastries so irresistible.
This recipe is also incredibly versatile and perfect for meal prep. You can make a batch on Sunday and reheat individual pastries throughout the week for quick, indulgent breakfasts. They’re also fantastic for entertaining, brunch gatherings, or anytime you want to treat yourself to something special without the expense of buying from a bakery.
If you’re looking for more homemade breakfast treats that taste bakery-quality, these Bisquick sausage egg and cheese muffins are another fantastic option that brings bakery flavors to your kitchen.
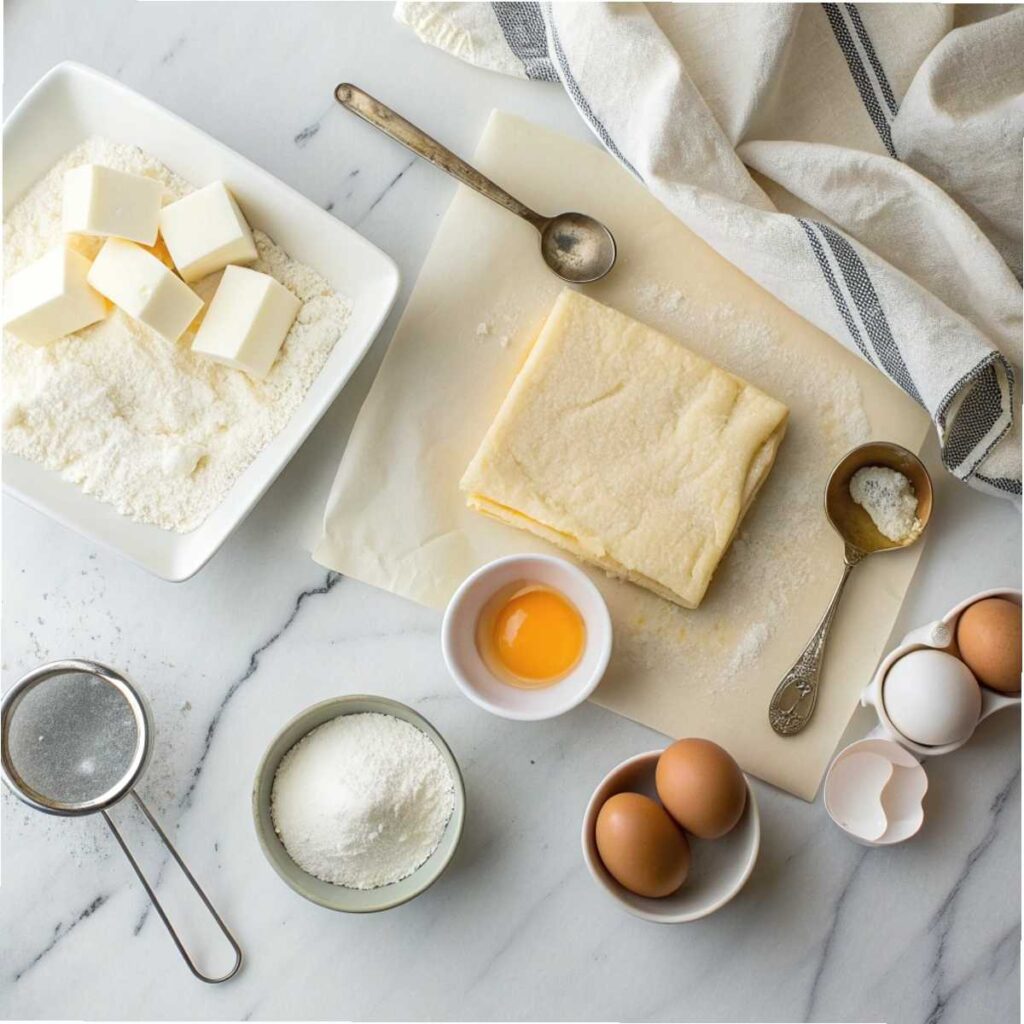
Ingredients for Cheese Danish
This recipe uses simple, accessible ingredients that you probably already have in your kitchen, making it perfect for spontaneous baking.
What You’ll Need
For the Pastries:
- 1 sheet frozen puff pastry, thawed
- 8 oz cream cheese, softened
- 1/4 cup granulated sugar
- 1 large egg yolk
- 1 teaspoon vanilla extract
- 1/4 teaspoon salt
- 1 egg, beaten (for egg wash)
For the Sweet Glaze:
- 1 cup powdered sugar
- 2-3 tablespoons milk
- 1/2 teaspoon vanilla extract
- Pinch of salt
Optional Variations:
- 1 tablespoon lemon zest
- 1/4 cup fruit preserves
- 1/4 cup chopped fresh berries
Why These Ingredients Matter
The secret to amazing cheese danish pastry lies in using quality ingredients and proper technique. Frozen puff pastry is the key to making this recipe accessible; it provides that incredible buttery, flaky texture without requiring hours of laminating dough. Make sure to thaw it properly according to package directions for the best results.
Room temperature cream cheese is essential for smooth, lump-free filling. Cold cream cheese won’t mix properly and will create a grainy texture that affects the final result. The combination of sugar, egg yolk, and vanilla creates a filling that’s rich but not overly sweet, allowing the tangy cream cheese flavor to shine through.
The egg wash is what gives these pastries that beautiful golden, glossy finish that makes them look professionally made. Don’t skip this step, as it’s what transforms simple ingredients into bakery-worthy results. The sweet glaze or icing drizzle adds the perfect finishing touch that makes these look and taste like something from an upscale coffee shop.
Instructions for Making Cheese Danish
Creating these gorgeous pastries requires some technique, but the process is much simpler than you might think.
Step-by-Step Directions
Step 1: Preheat your oven to 400°F and line a large baking sheet with parchment paper.
Step 2: In a medium bowl, beat together softened cream cheese, granulated sugar, egg yolk, vanilla extract, and salt until smooth and creamy. Set aside.
Step 3: Unfold the thawed puff pastry sheet on a lightly floured surface. Cut into 9 equal squares using a sharp knife.
Step 4: Place pastry squares on the prepared baking sheet, spacing them about 2 inches apart.
Step 5: Make diagonal cuts from each corner toward the center, stopping about 1 inch from the middle to create four flaps.
Step 6: Place about 2 tablespoons of cream cheese filling in the center of each square.
Step 7: Fold alternating flaps over the filling to create a pinwheel or envelope shape, pressing gently to seal.
Step 8: Brush the tops of each pastry with beaten egg wash for that golden finish.
Step 9: Bake for 15-18 minutes until golden brown and puffed. Cool slightly before glazing.
Step 10: Make the glaze by whisking powdered sugar, milk, vanilla, and salt until smooth. Drizzle over warm pastries.
Hint: Don’t overfill the pastries! Too much filling will cause them to leak during baking and create a mess. About 2 tablespoons per pastry is the perfect amount for beautiful results.
Top Tip
The key to perfect cheese danish pastry recipe results lies in working with properly thawed puff pastry. Take it out of the freezer about 30-40 minutes before you plan to use it. It should be soft enough to unfold without cracking but still cold enough to handle easily.
When cutting and shaping the pastries, work quickly to prevent the puff pastry from becoming too warm. If it gets soft and sticky, pop it back in the refrigerator for 10-15 minutes to firm up before continuing.
Make sure your cream cheese is truly at room temperature before mixing. This ensures a smooth, lump-free filling that spreads easily and looks professional. You can speed this process by cutting the cream cheese into small cubes and letting them sit at room temperature for about 30 minutes.
Don’t skip the egg wash! This is what gives your pastries that beautiful, glossy, golden finish that makes them look bakery-quality. Use a pastry brush for even application, or gently dab with a paper towel if you don’t have a brush.
For more breakfast pastry inspiration that delivers bakery-quality results at home, these frozen French toast sticks in air fryer offer another quick way to create special breakfast treats.
Personal Anecdote
I first attempted homemade Danish pastries after falling in love with the cheese danish from our local coffee shop but getting tired of spending $4 each time I wanted one. I thought making them at home would be impossibly complicated, involving hours of dough lamination and advanced pastry techniques I’d never mastered.
My first attempt was a disaster. I tried to make the pastry dough from scratch, and it was a sticky, unworkable mess. The filling leaked everywhere during baking, and the final result looked nothing like the beautiful pastries I was trying to recreate. I was so discouraged that I almost gave up on the idea entirely.
Grandma stopped by the next morning and saw me cleaning flour off every surface in my kitchen, clearly frustrated. “Jazzy,” she said with her gentle wisdom, “there’s no shame in using good shortcuts, honey. The best bakers know when to make things from scratch and when to let quality ingredients do the work for you.” She introduced me to using frozen puff pastry and taught me the proper technique for shaping and filling. The next batch was absolutely perfect, and now I make these regularly for special occasions and lazy weekend mornings.
Substitutions for Cheese Danish
This cream cheese danish recipe adapts beautifully to different tastes and dietary needs while maintaining its delicious appeal.
Dairy-free version – Use vegan cream cheese and plant-based milk for the glaze. The texture will be slightly different but still delicious.
Reduced sugar option – Cut the sugar in the filling by half and use sugar-free powdered sugar for the glaze to reduce overall sweetness.
Flavor variations – Add lemon zest to the filling for citrus brightness, or swirl in fruit preserves for different flavor combinations.
Gluten-free option – Use gluten-free puff pastry if available, though the texture may be slightly different from traditional pastry.
Different fillings – Try almond paste mixed with cream cheese, or add fresh berries to the cream cheese mixture for fruity variations.
Savory version – Omit the sugar and glaze, and add herbs like chives or dill to the cream cheese for a savory brunch option.
Variations on Cheese Danish
Once you’ve mastered the basic technique, these delicious variations will keep your Danish game exciting and flavorful.
Fruit-topped version – Add fresh berries or sliced fruit on top of the cream cheese filling before baking for beautiful, colorful pastries.
Chocolate cheese danish – Add 2 tablespoons cocoa powder to the cream cheese filling and drizzle with chocolate glaze instead of vanilla.
Cinnamon sugar version – Sprinkle the pastries with cinnamon sugar before baking for extra warmth and spice.
Almond danish – Replace half the cream cheese with almond paste for a more traditional European flavor.
Seasonal variations – Add pumpkin puree and spices in fall, or lemon zest and poppy seeds in spring for seasonal appeal.
Mini danish – Cut the puff pastry into smaller squares to make bite-sized appetizers perfect for parties or brunch spreads.
Each variation maintains that signature buttery, flaky texture while offering completely different flavor experiences, much like how my butter swim biscuits recipe adapts to different flavor combinations.
Equipment for Cheese Danish
Having the right tools makes creating these beautiful pastries much easier and ensures professional-looking results.
Large baking sheet – You’ll need plenty of space for the pastries to puff up without crowding.
Parchment paper – Essential for preventing sticking and ensuring easy cleanup.
Sharp knife – For clean cuts on the puff pastry that won’t drag or tear the delicate layers.
Medium mixing bowl – Perfect size for preparing the cream cheese filling without overmixing.
Electric mixer or whisk – For creating smooth, lump-free cream cheese filling.
Pastry brush – Essential for applying the egg wash evenly for that beautiful golden finish.
Measuring cups and spoons – Accurate measurements ensure the perfect balance of flavors.
A ruler can be helpful for cutting even squares, though eyeballing it works fine for rustic-looking pastries.
Storage Tips for Cheese Danish
These pastries are best enjoyed fresh but store reasonably well with proper handling.
Same-day serving – Best consumed within 4-6 hours of baking for optimal texture and flavor.
Refrigerator storage – Store covered in the refrigerator for up to 2 days. The pastry may lose some crispness but will still be delicious.
Reheating instructions – Warm in a 350°F oven for 5-7 minutes to restore some of the original crispness. Avoid the microwave, which makes pastry soggy.
Freezing tips – Freeze unbaked pastries on a tray, then transfer to freezer bags. Bake directly from frozen, adding 2-3 extra minutes to cooking time.
Make-ahead assembly – Assemble pastries the night before, cover, and refrigerate. Brush with egg wash and bake in the morning for fresh pastries.
The cream cheese filling holds up well, but the pastry is always best when fresh and crispy from the oven.
For more make-ahead breakfast ideas that reheat beautifully, this crack breakfast casserole recipe is another fantastic option for special morning meals.
Grandma’s Secret for Cheese Danish
Grandma’s secret to the most professional-looking cheese danish? She always chills the assembled pastries for 15 minutes before baking. “Jazzy,” she told me with that knowing smile, “cold pastry puffs better and holds its shape, honey. That little rest in the refrigerator is what makes them look like they came from a fancy bakery instead of a home kitchen.”
Her other crucial tip is about the cream cheese filling: “Always taste your filling before you use it, sweet girl. Cream cheese can vary in tanginess, so you might need a pinch more sugar or a squeeze of lemon to get it just right. Trust your taste buds, not just the recipe.”

These gorgeous golden pastries showcase that perfect bakery-style puff and shine, filled with creamy, tangy filling that makes every bite absolutely irresistible.
FAQ about Cheese Danish
What does a cheese danish have in it?
A traditional cheese danish contains puff pastry filled with a sweetened cream cheese mixture, typically made with cream cheese, sugar, egg yolk, and vanilla. The pastry is usually topped with a sweet glaze or icing for the finishing touch.
What does cheese danish taste like?
Cheese danish has a buttery, flaky exterior with a creamy, tangy-sweet filling. The cream cheese provides a slight tartness balanced by sugar, while the puff pastry adds rich, buttery flavor and crispy texture. It’s indulgent but not overly sweet.
What kind of cheese is Danish?
In cheese danish pastries, cream cheese is used, not traditional Danish cheese. The pastry gets its name from Danish pastry-making techniques, not from Danish cheese varieties. Cream cheese provides the perfect creamy, tangy flavor for this sweet pastry.
Why is cheese danish so good?
The combination of buttery, flaky puff pastry with creamy, tangy filling creates an irresistible contrast of textures and flavors. The slight sweetness balanced with the tartness of cream cheese, plus that satisfying crunch, makes it a perfect indulgent treat that feels both comforting and sophisticated.
Conclusion
Who says you need to visit an expensive bakery or coffee shop to enjoy incredible pastries? This cheese danish recipe proves that with a few simple ingredients and the right technique, you can create bakery-quality results right in your own kitchen using the wonderful magic of store-bought puff pastry.
The combination of buttery, flaky puff pastry and creamy, tangy filling creates something truly special that rivals anything you’d buy from a professional bakery. This clever shortcut means you can enjoy fresh, warm pastries whenever the craving strikes, all while saving money and impressing everyone with your apparently advanced baking skills.
Whether you’re hosting a special brunch, treating yourself to a weekend indulgence, or looking for a way to make ordinary mornings feel extraordinary, these homemade Danish pastries deliver incredible flavor and satisfaction in every single bite. For more creative filling ideas that work beautifully with pastry, check out this helpful cheese filling guide that offers additional inspiration for your baking adventures.
Don’t forget to try this mozzarella corn dog for another fun pastry-wrapped treat that’s perfect for different occasions. Here’s to the magic of puff pastry! It’s our delicious little secret for creating an impressive, elegant pastry without spending all day in the kitchen. Enjoy your effortlessly amazing creation!

Grandma’s Easy Cheese Danish (Bakery-Style in 30 Mins!)
Equipment
- 1 Large baking sheet
- 1 Parchment Paper Grandma always said this is non-negotiable for easy cleanup.
- 1 Sharp knife For clean cuts that don't squish the pastry layers.
- 1 Medium mixing bowl
- 1 Electric mixer or whisk An electric mixer makes the filling extra smooth, just how she liked it.
- 1 Pastry brush For applying that beautiful golden egg wash.Export to Sheets
Ingredients
For the Pastries:
- 1 sheet [frozen puff pastry] Thawed according to package directions, but still cold. This was Grandma's magic trick.
- 8 oz [cream cheese] Softened to room temperature. A must for a lump-free filling!
- 1/4 cup [granulated sugar]
- 1 large [egg yolk] Just the yolk makes the filling extra rich.
- 1 tsp [vanilla extract]
- 1/4 tsp [salt]
- 1 [egg], beaten For the egg wash.
For the Sweet Glaze:
- 1 cup [powdered sugar]
- 2-3 tbsp [milk] Use less for a thicker glaze.
- 1/2 tsp [vanilla extract]
- pinch [salt] Balances the sweetness perfectly.
Instructions
- First things first, get your oven preheating to 400°F (200°C). I can still picture Grandma tearing off a sheet of parchment paper with purpose and lining her favorite baking sheet. It’s the little rituals that make everything taste better.
- In a medium bowl, beat the softened [cream cheese], [granulated sugar], rich [egg yolk], [vanilla extract], and [salt]. Grandma always insisted, "Jazzy, make sure that cream cheese is soft, honey. No one wants a lumpy filling!" Beat it until it’s perfectly smooth and creamy, just like she taught me.
- Gently unfold your thawed [frozen puff pastry] on a lightly floured surface. Using a sharp knife, cut it into 9 equal squares. I remember watching Grandma do this, her hands so sure and steady. She’d say the secret is to work quickly so the butter in the pastry stays cold.
- Place the pastry squares on your prepared baking sheet. Now for the fun part! Make diagonal cuts from each corner toward the center, stopping about an inch from the middle. Spoon about 2 tablespoons of that lovely cheese filling into the center of each square. Then, fold every other flap over the filling, pressing gently to seal. It always looked like magic when Grandma made these little pinwheels.
- This was my favorite job as a kid. Gently brush the tops of each pastry with the beaten [egg]. Grandma called this "painting them pretty." It's what gives them that beautiful, glossy, golden-brown finish that makes them look like they came from a fancy bakery.
- Slide the baking sheet into the oven and bake for 15-18 minutes. The whole house will start to smell warm, buttery, and sweet—the best smell in the world. You'll know they're done when they're gloriously puffed up and a deep golden brown. Let them cool slightly on the sheet.
- While the pastries are cooling, whisk together the [powdered sugar], [milk], [vanilla extract], and a pinch of [salt] until you have a smooth glaze. "Don't skip the drizzle, sweet girl," Grandma would say, "it's the finishing touch." Drizzle it over the warm pastries and try to wait at least a minute before you eat one!
Notes
- Grandma’s Secret: For an extra-puffy, professional look, pop the assembled (unbaked) pastries in the fridge for 15 minutes before brushing with egg wash and baking. Grandma swore this little rest helps the pastry hold its shape and puff up beautifully.
- Storage: These are best enjoyed the day they are made. If you have leftovers, store them in an airtight container in the refrigerator for up to 2 days. Reheat in a 350°F oven for 5-7 minutes to bring back some of the crispness.
- Variations: Feel free to add a teaspoon of lemon zest to the cream cheese filling for a bright, citrusy flavor. You can also swirl a small amount of your favorite fruit preserves into the filling before folding.