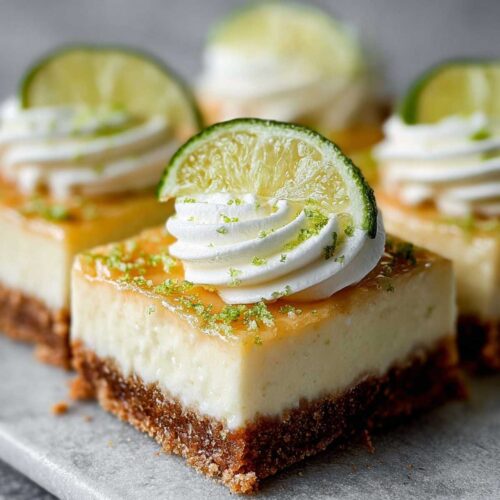
The desire for tropical flavors hits differently when you’re craving something bright and citrusy that doesn’t require the complexity of a traditional pie. These Key Lime Pie Bars capture all the tart and sweet magic of the classic dessert in a format that’s infinitely easier to serve and transport.
With their graham cracker crust foundation and creamy citrus dessert filling made from fresh key lime juice and sweetened condensed milk, they deliver that perfect balance of tangy and rich that makes key lime desserts so irresistible.
Jump To
Why You’ll Love This Key Lime Pie Bars
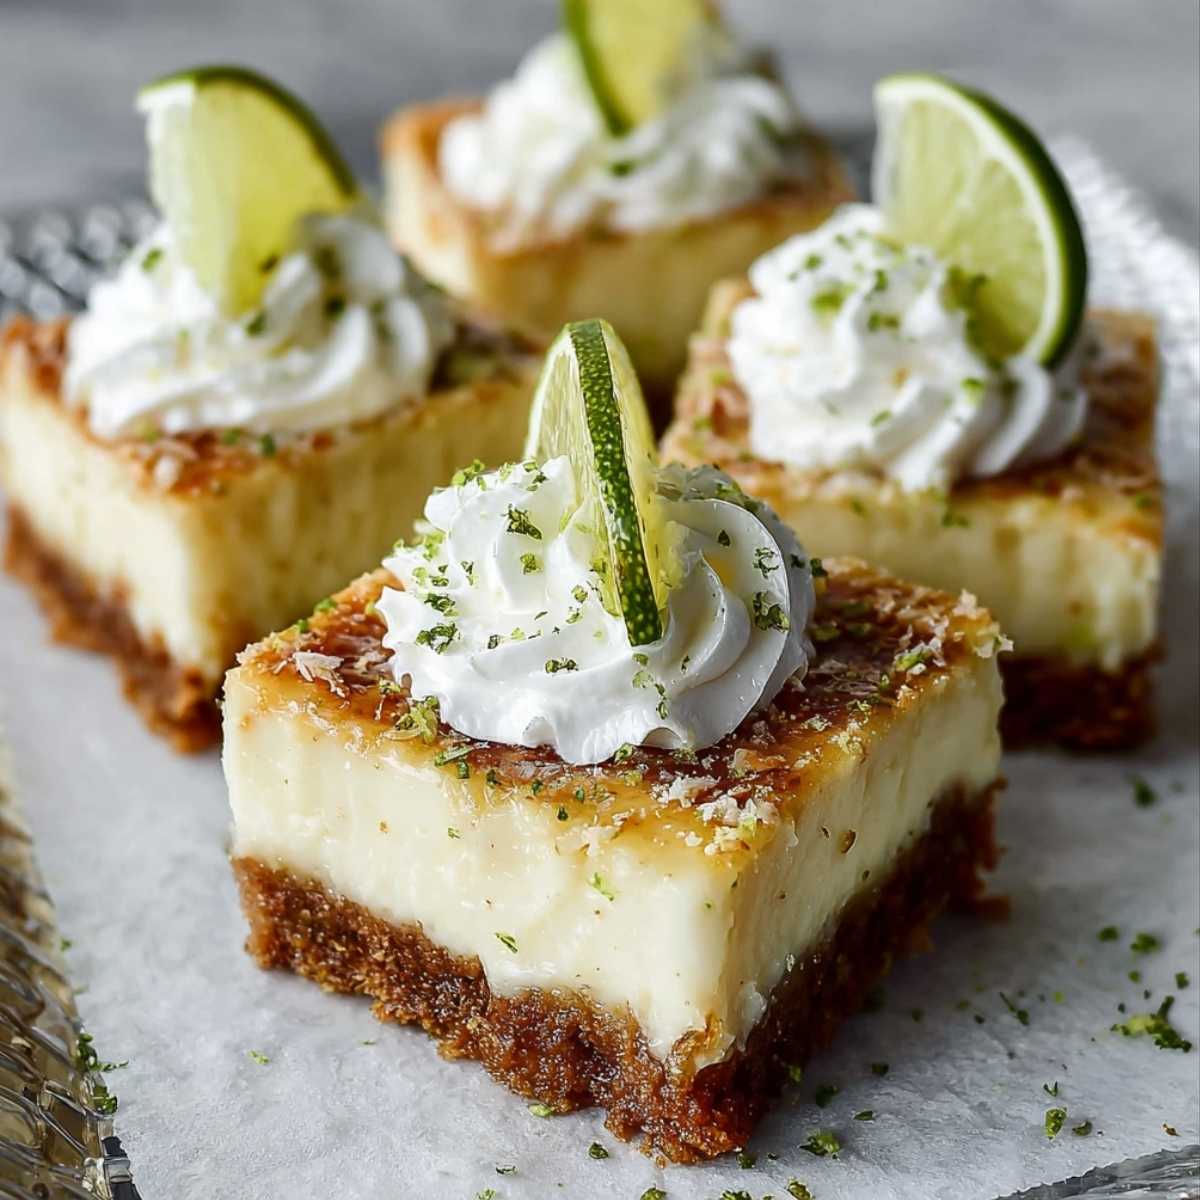
These creamy key lime pie bars deliver incredible tropical flavor with that perfect combination of buttery crumb crust and smooth, tart filling that creates the most satisfying bite. The make-ahead dessert bars format makes them ideal for entertaining and perfect as birthday dessert for a crowd occasions when you want something impressive but manageable. They’re excellent for dessert to bring situations and work beautifully as dessert to take to work because they hold their shape and travel well. These definitely rank among the best light and fruity desserts that showcase the zest of key limes while delivering that signature tart and tangy flavor that makes people think of sunshine and tropical beaches.
Ingredients for Key Lime Pie Bars
Getting your ingredients ready for this key lime pie bars recipe feels exciting because you know you’re about to create something that brings sunshine to any table.
What You’ll Need
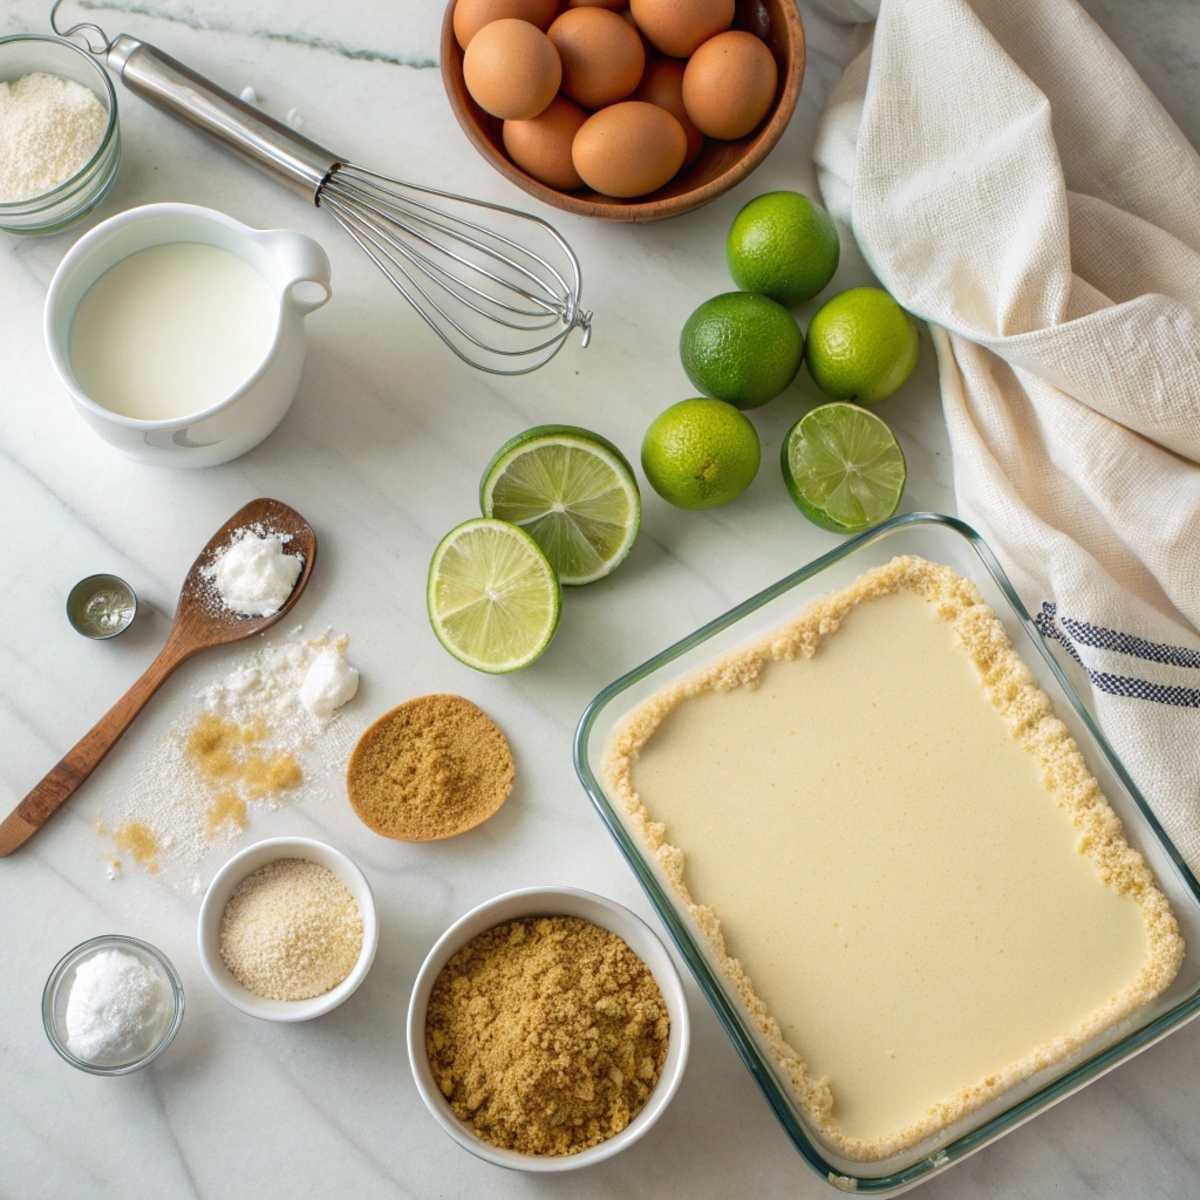
For the Graham Cracker Crust:
- 1 1/2 cups graham cracker crumbs
- 1/4 cup granulated sugar
- 6 tablespoons unsalted butter, melted
- 1/4 teaspoon salt
For the Sweetened Condensed Milk Filling:
- 3 large eggs
- 1 can (14 oz) sweetened condensed milk
- 1/2 cup fresh key lime juice (about 12-15 key limes)
- 2 tablespoons key lime zest
- 1/4 teaspoon vanilla extract
- Pinch of salt
For Optional Whipped Cream Topping:
- 1 cup heavy whipping cream
- 2 tablespoons powdered sugar
- 1/2 teaspoon vanilla extract
- Extra lime zest for garnish
Why These Ingredients Matter
The key to perfect key lime pie bars with condensed milk lies in using authentic key lime juice rather than regular lime juice – key limes have a more intense, floral tartness that defines this dessert. If you can’t find fresh key limes, bottled key lime juice is preferable to regular limes. The sweetened condensed milk creates that signature rich, custard-like texture without requiring tempering eggs or complicated techniques, similar to the creamy textures I achieve in my espresso coffee cheesecake.
Instructions for Making Key Lime Pie Bars
Step-by-Step Directions
Step 1: Preheat oven to 350°F and line a 9×13-inch baking pan with parchment paper, leaving overhang for easy removal.
Step 2: For the crust, combine graham cracker crumbs, sugar, melted butter, and salt in a bowl. Mix until evenly moistened and press firmly into the bottom of the prepared pan.
Step 3: Bake the crust for 10 minutes until lightly golden and set. Remove from oven but leave oven on.
Step 4: While crust bakes, whisk together eggs, sweetened condensed milk, key lime juice, lime zest, vanilla, and salt until smooth and well combined.
Step 5: Pour the filling over the warm crust and spread evenly to the edges.
Step 6: Bake for 15-18 minutes until the filling is set but still slightly jiggly in the center. It will continue to set as it cools.
Step 7: Cool completely at room temperature, then refrigerate for at least 3 hours or overnight before cutting.
Step 8: Cut into bars and serve chilled, optionally topped with whipped cream and extra lime zest.
Hint: Don’t overbake the filling – it should still have a slight jiggle when you remove it from the oven, as it will continue to set while cooling!
Top Tip
The secret to perfect old fashioned key lime pie bars is achieving the right balance between tart and sweet while maintaining that silky texture. Press the graham cracker crust firmly to prevent it from crumbling when cut, and make sure it’s golden before adding the filling. For the most authentic key lime bars pioneer woman style results, use fresh key lime juice and don’t skip the zest – it adds essential oils that intensify the flavor.
The filling should be just set when you remove it from the oven, similar to the texture techniques I use in my rose pistachio cheesecake ice cream for that perfect creamy consistency.
My Key Lime Discovery
These bars came into my life during a particularly stressful week when I needed to bring dessert to a potluck but felt overwhelmed by the thought of making a whole pie. I’d always been intimidated by key lime pie because of the meringue and potential for curdling, but Grandma suggested we try a bar version instead. “Jazzy,” she said while examining my recipe collection, “sometimes the best desserts are the ones that give you all the flavor without all the fuss.”
My first attempt was too sweet and missing that signature tartness that makes key lime desserts special. Grandma tasted it and immediately said, “Needs more pucker.” She taught me about balancing the sweetness of condensed milk with enough lime juice to make your mouth tingle slightly, and how the zest is just as important as the juice for authentic flavor.
By the second batch, I had created these key lime pie bars magnolia bakery worthy treats that became the hit of every gathering. Now they’re my go-to when I want something that tastes sophisticated but doesn’t require pie-making skills, and I always remember Grandma’s wisdom about finding the perfect pucker balance.
Substitutions for Key Lime Pie Bars
If you need to adapt this easy key lime pie bars recipe for different preferences or ingredient availability, here are substitutions that maintain that incredible citrusy character.
Key lime juice – if unavailable, use a combination of regular lime juice and lemon juice (3:1 ratio) for the closest flavor approximation, though it won’t be exactly the same.
Graham crackers – vanilla wafer cookies, digestive biscuits, or even crushed shortbread cookies create different but delicious crusts.
Sweetened condensed milk – you can make your own by simmering milk and sugar, though the canned version is much more convenient and reliable.
Eggs – for key lime pie bars no bake versions, substitute with unflavored gelatin dissolved in hot water, though the texture will be different, similar to how I adapt textures in my no bake banana split cake.
Variations on Key Lime Pie Bars
These versatile keylime pie bars recipe creations adapt beautifully to different presentations while maintaining that signature tropical appeal.
Key lime pie bars scientifically sweet – adjust the tartness by increasing or decreasing lime juice by 1-2 tablespoons to find your perfect balance.
Triple-layer key lime pie bars – add a layer of cream cheese filling between the crust and key lime layer for extra richness.
Biscoff key lime pie – replace graham crackers with crushed Biscoff cookies for a spiced cookie crust that complements the lime beautifully.
Sheet pan key lime pie – double the recipe and use a half-sheet pan for larger crowds.
Key lime pie cheesecake bars pioneer woman style – add cream cheese to the filling for a hybrid dessert that’s even richer, similar to the cream cheese techniques in my red velvet cream cheese bundt cake.
Equipment for Key Lime Pie Bars
A 9×13-inch metal or glass baking pan is essential – metal conducts heat better for even baking, while glass lets you see the bottom crust browning. Line with parchment paper for easy removal and clean cuts.
A fine-mesh strainer is helpful for removing any pulp from fresh lime juice, ensuring a completely smooth filling. A microplane grater creates the finest lime zest that distributes evenly without bitter white pith.
Sharp knife and clean cutting board are crucial for neat slices – wipe the knife between cuts for the most professional presentation.
Storage Tips for Key Lime Pie Bars
Chilled bar dessert requirements:
- Always store covered in the refrigerator for up to 5 days
- These key lime bars easy recipes actually improve in flavor after the first day
- Keep chilled until serving for best texture and food safety
Freezing:
- Freeze cut bars individually wrapped for up to 3 months
- Thaw in refrigerator before serving – don’t thaw at room temperature
- Perfect for dessert course meal planning when you want to make ahead
Serving tips: These luau food inspired treats are best served chilled and cut with a sharp knife. For clean slices, run knife under warm water and wipe clean between cuts.
Grandma’s Secret for Key Lime Pie Bars
Grandma’s secret ingredient was a tablespoon of sour cream mixed into the filling. “It adds just a little extra tang and makes the texture even creamier, Jazzy,” she explained while folding it in gently. “Makes people wonder what makes yours taste better than everyone else’s.” The sour cream enhances the tartness while creating an incredibly smooth, luxurious texture.
Her other trick? She always let the bars come to room temperature for exactly 10 minutes before serving. This takes the chill off just enough to let the flavors bloom while maintaining that perfect creamy texture that makes key lime desserts so special.

These perfect golden bars showcase Grandma’s sour cream secret with that gorgeous creamy lime filling and perfectly pressed graham cracker crust.
FAQ about Key Lime Pie Bars
What gives key lime bars their flavor?
The distinctive flavor comes from key lime juice, which is more tart and floral than regular limes, combined with sweetened condensed milk that balances the acidity. The lime zest adds essential oils that intensify the citrus flavor, while the graham cracker crust provides a sweet, slightly salty contrast.
What is the best crust for key lime bars?
Graham cracker crust is traditional and provides the perfect sweet, slightly salty base that complements the tart filling. The buttery crumbs also help cut through the richness of the condensed milk. Some variations use vanilla wafers or even shortbread for different flavors.
What are common key lime pie mistakes?
Common mistakes include overbaking the filling (which causes cracking), using regular limes instead of key limes, not pressing the crust firmly enough, and not chilling long enough before cutting. The filling should still jiggle slightly when removed from the oven.
Can I use regular limes for key lime bars?
While key limes are preferred for authentic flavor, you can substitute regular lime juice mixed with a little lemon juice if key limes aren’t available. The flavor will be different – less floral and intense – but still delicious. Bottled key lime juice is better than fresh regular limes for authenticity.
Conclusion
Creating these Key Lime Pie Bars has taught me that the best desserts often come from finding simpler ways to achieve complex flavors. They’ve become my go-to when I want to impress without stress, delivering all the tropical satisfaction of traditional key lime pie in a format that actually works with real life. The fact that they’re easier to cut, serve, and store than a whole pie feels like a bonus on top of their already perfect flavor.
If you’re interested in exploring the traditional version, this Easy Key Lime Pie recipe offers the classic approach. How do you prefer your citrus desserts – in traditional pie form or as convenient bars? I’d love to hear about your own baking shortcuts and flavor discoveries!
Jasmine 💛
Grandma’s Easy Key Lime Pie Bars
Equipment
- 1 9×13 inch baking pan Metal works best for an evenly baked crust.
- 1 Parchment Paper Leave an overhang to easily lift the bars out.
- 1 Large mixing bowl For mixing the filling.
- 1 Medium mixing bowl For combining the crust ingredients.
- 1 Whisk To get the filling perfectly smooth.
- 1 Microplane or fine zester Grandma always said the best flavor is in the zest!
Ingredients
For the Graham Cracker Crust:
- 1 1/2 cups graham cracker crumbs About 10-12 full sheets.
- 1/4 cup granulated sugar
- 6 tablespoons unsalted butter Melted and slightly cooled.
- 1/4 teaspoon salt
For the Key Lime Filling:
- 3 large eggs
- 1 can (14 oz) sweetened condensed milk The heart of that classic creamy texture.
- 1/2 cup fresh key lime juice About 12-15 key limes. It's worth the effort!
- 2 tablespoons key lime zest
- 1 tablespoon sour cream This is Grandma's secret for extra tang!
- 1/4 teaspoon vanilla extract
- 1 pinch salt
For the Optional Topping:
- 1 cup heavy whipping cream For making fresh whipped cream.
- 2 tablespoons powdered sugar
- 1/2 teaspoon vanilla extract
- Extra lime zest For that final, beautiful garnish.
Instructions
- First things first, get your oven preheating to 350°F (175°C). Grandma's number one rule was to never put anything in a cold oven. Line a [9×13-inch baking pan] with [parchment paper], making sure to leave some hanging over the sides like little handles. It makes getting the bars out later a breeze.
- In a medium bowl, mix together the [graham cracker crumbs], [granulated sugar], and a pinch of [salt]. Pour in the [melted unsalted butter] and mix it all up with a fork until it looks like damp sand. Grandma called this the "sandy foundation for sunshine."
- Press the crumb mixture firmly and evenly into the bottom of your prepared pan. I always use the bottom of a measuring cup to get it nice and flat, just like she taught me. Pop it into the oven and bake for 10 minutes, just until it's lightly golden and your kitchen starts to smell amazing.
- While the crust is baking, let's make the magical part. In a large bowl, whisk the [large eggs] until they're just combined. Then, pour in that glorious can of [sweetened condensed milk], the [fresh key lime juice], [key lime zest], [vanilla extract], and a [pinch of salt]. Whisk it all together until it's perfectly smooth and creamy. Don't you just love that pale green color?
- Now for the little trick she scribbled in the margin of her notebook: gently whisk in the [sour cream]. She swore this is what made her bars better than anyone else's, adding the perfect subtle tang and making the filling unbelievably smooth.
- Once the crust is out of the oven, pour the lime filling evenly over the warm crust. Place the pan back in the oven and bake for 15-18 minutes. The center should be just set but still have a slight jiggle to it. "Don't you dare overbake it, Jazzy," she'd say, "it'll set up the rest of the way as it cools."
- Let the pan cool completely on a wire rack at room temperature. Then, cover it and move it to the refrigerator to chill for at least 3 hours, or even overnight. This is the hardest part, the waiting! But it's so important for the bars to set up perfectly for clean slices.
- When you're ready to serve, use the parchment handles to lift the whole block out of the pan. Cut into squares and top with a dollop of fresh whipped cream and a sprinkle of [extra lime zest] if you're feeling fancy. They taste like a perfect summer day.
Notes
- Key Limes vs. Regular Limes: For that authentic, floral tartness, fresh key limes are truly best. If you can’t find them, bottled key lime juice is the next best option. Regular limes (Persian limes) will work in a pinch, but the flavor will be a bit different.
- Make-Ahead Tip: These bars are a perfect make-ahead dessert! The flavor actually gets even better the next day. They can be stored, covered, in the refrigerator for up to 5 days.
- For Clean Slices: Run a sharp knife under hot water and wipe it clean between each cut. It makes for a beautiful, professional presentation.
- Crust Variations: Feel free to get creative with the crust! Crushed vanilla wafers or shortbread cookies make delicious alternatives to graham crackers.
1 thought on “Easy Key Lime Pie Bars Recipe”