 Skip to content
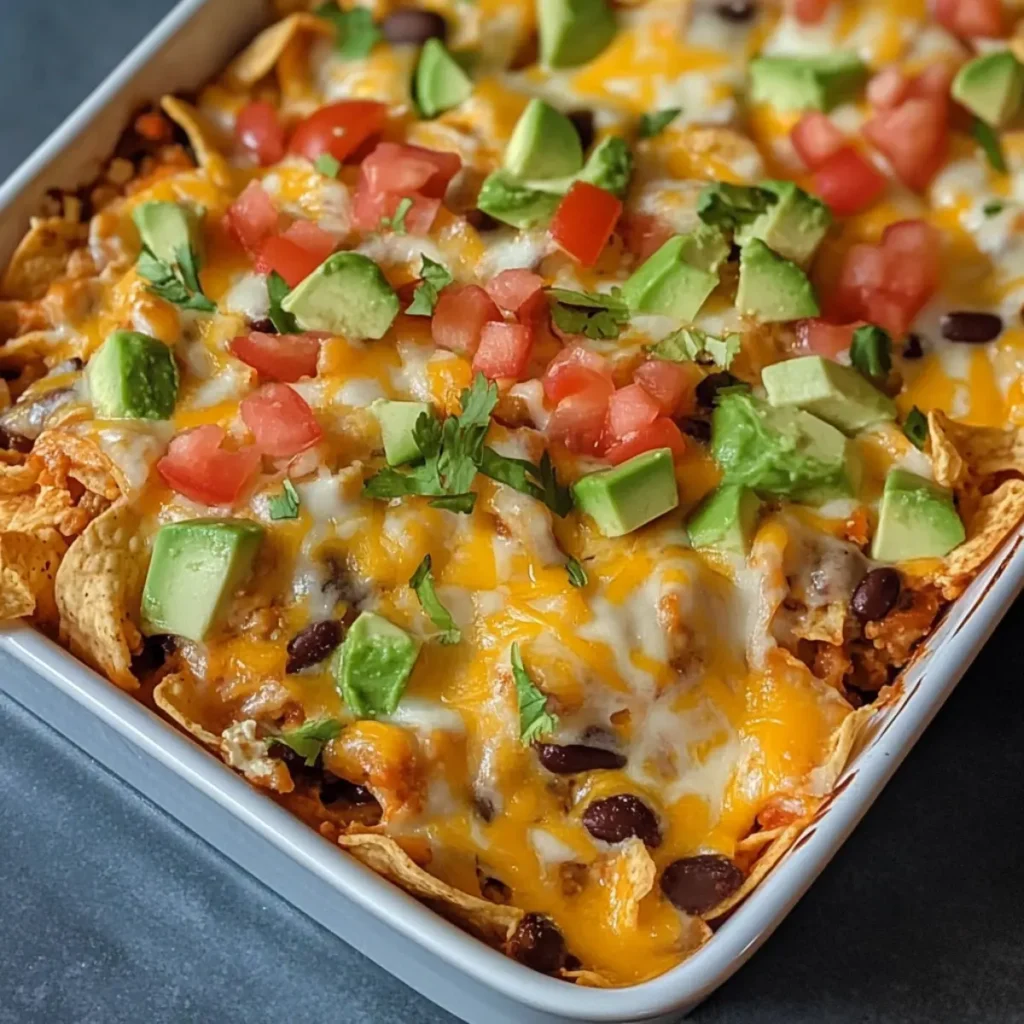
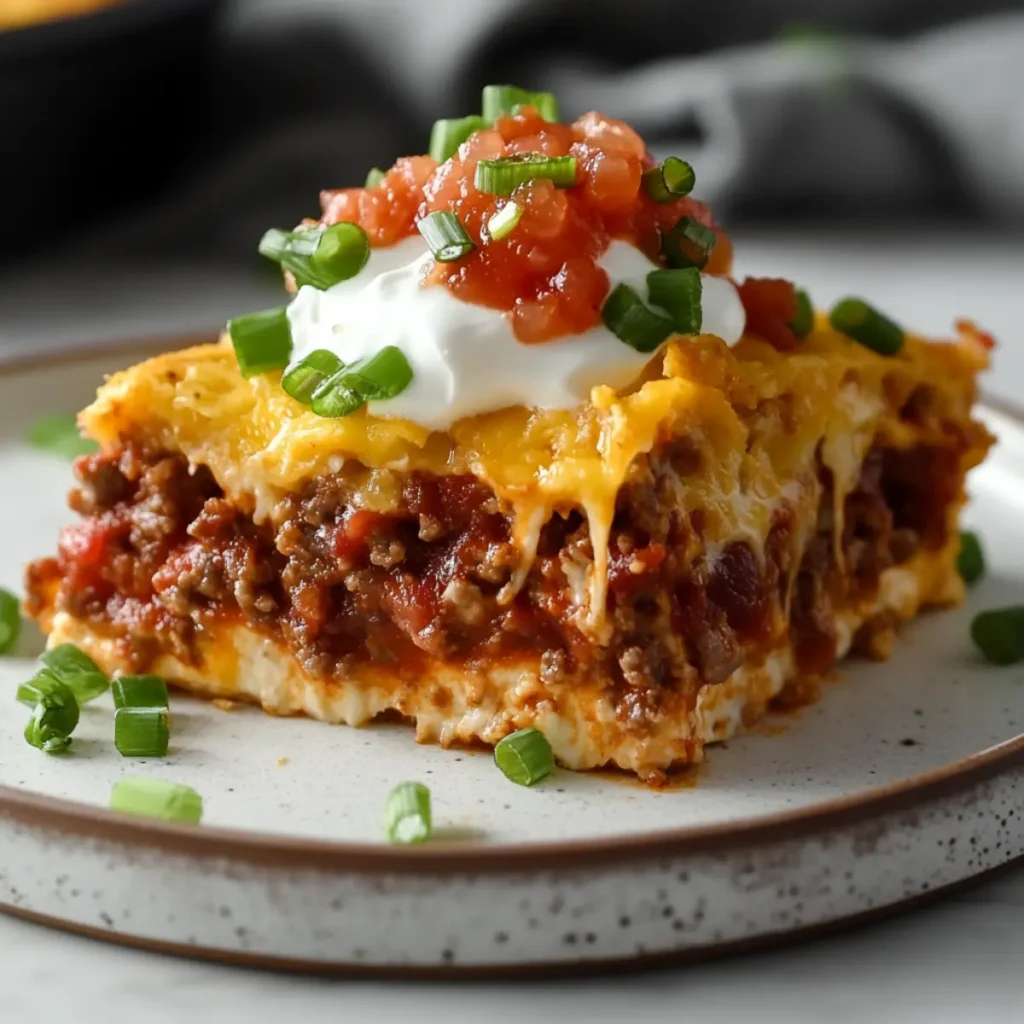
My kitchen nearly caught fire the first time I tried making emily’s excellent taco casserole – and that was before Grandma stepped in to show me how it’s really done! There’s a reason this dish has earned its “excellent” title, and once you taste that first cheesy, crunchy, spicy bite, you’ll understand why.
The smell of sizzling taco meat mixed with melting cheese still takes me right back to that scorched-pan disaster, followed by Grandma’s rescue with her famous spatula technique. “Jasmine, honey,” she’d said, “cooking is like dancing – you’ve got to feel the rhythm, not just follow the steps.” Now, every time I make this casserole, I can hear her laughter echoing through my kitchen, and somehow the flavors come out just right. Just like her German Chocolate Poke Cake that’s become a family legend, this recipe always brings everyone to the table.
Jump To
Emily’s Excellent Taco Casserole Ingredients
Everything You’ll Need
Setting out all these ingredients on my grandmother’s vintage blue-speckled cutting board always makes my kitchen feel like a proper cooking show set! The colorful array of fresh vegetables, glistening ground beef, and golden tortilla chips creates such a beautiful contrast. I’ve found that prepping everything before starting makes this emily’s excellent taco casserole come together like a dream – no scrambling for that can of beans while your meat’s getting overdone!
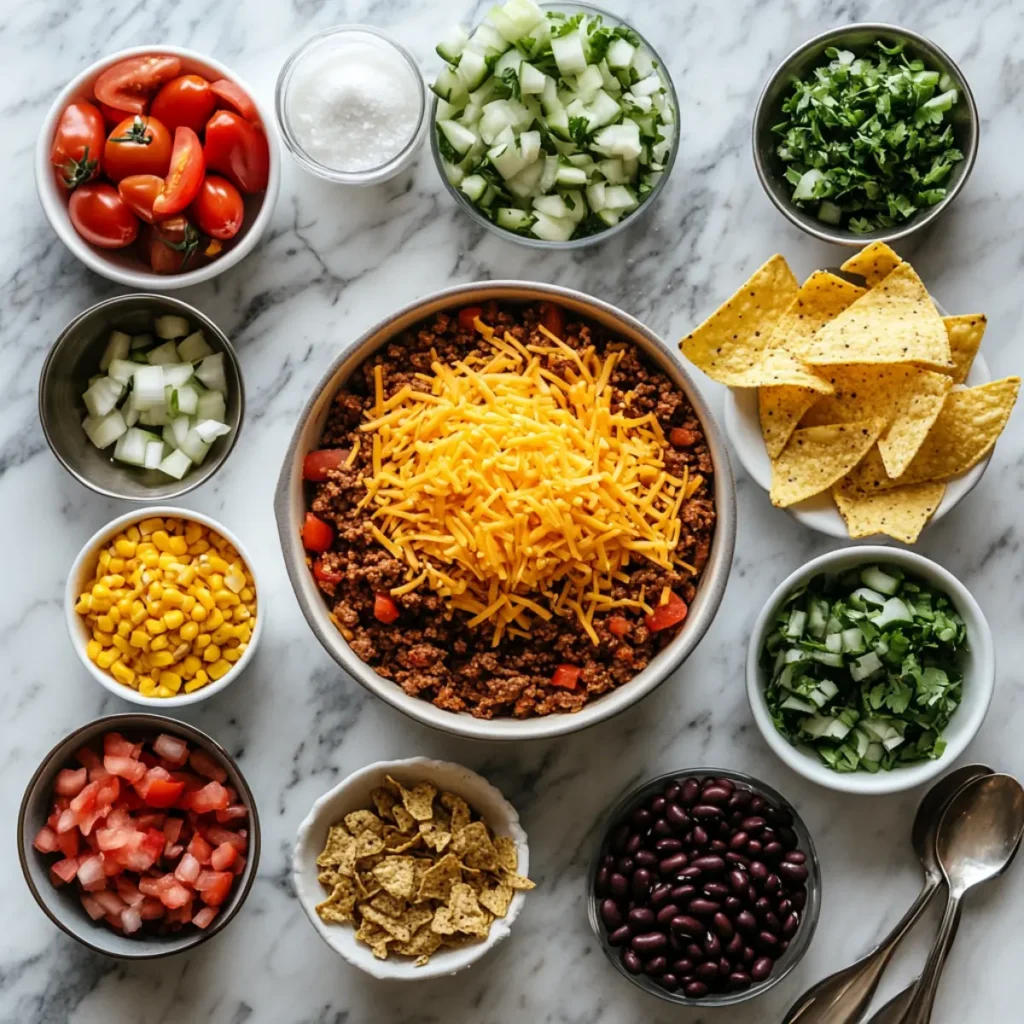
- Ground beef
- Yellow onion
- Taco seasoning mix
- Canned diced tomatoes
- Black beans
- Corn kernels (fresh, frozen, or canned)
- Flour tortillas
- Cheddar cheese
- Nacho chips
- Salsa
- Sour cream
- Green onions (for garnish)
See recipe card for quantities.
Emily’s Excellent Taco Casserole Instructions
Let’s Make Some Magic!
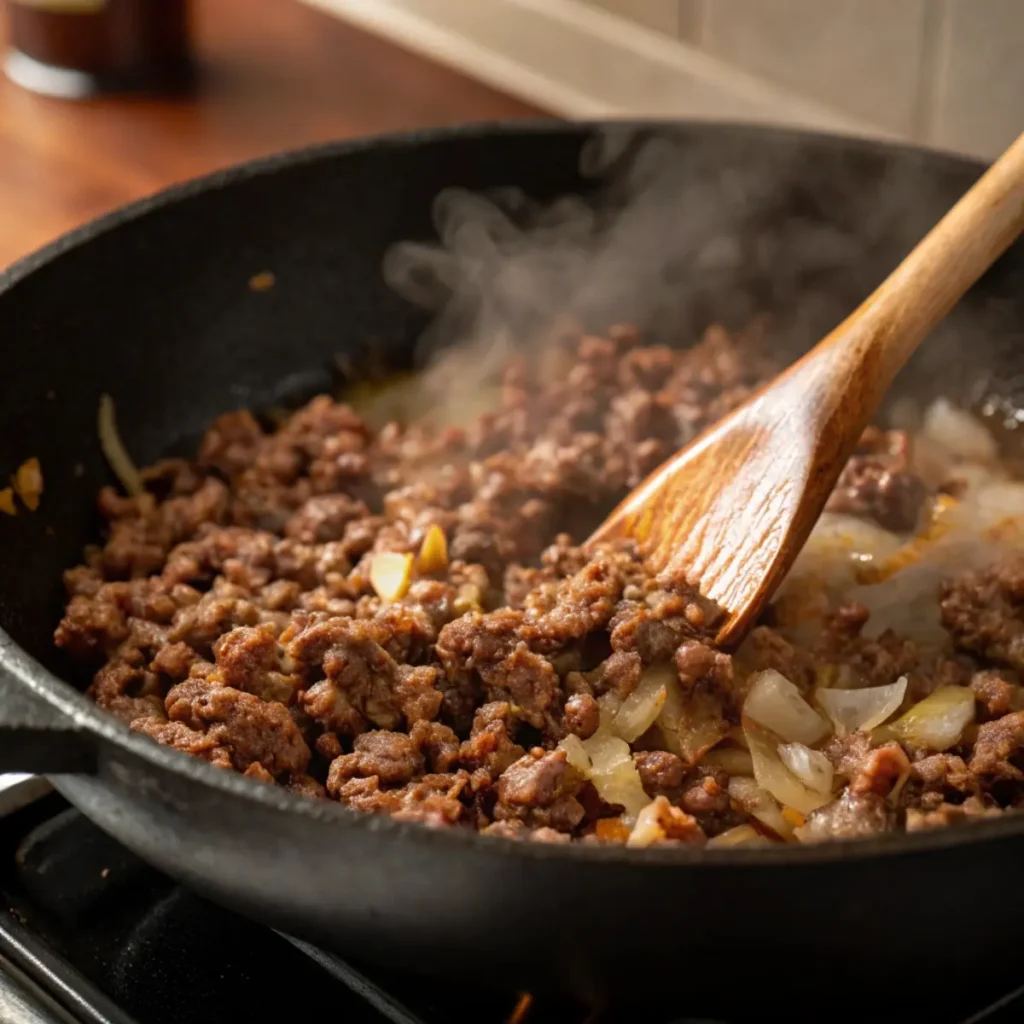
- Step 1: Start by browning your ground beef with diced onions in a large skillet over medium heat. That sizzle when the meat hits the pan always reminds me of Grandma’s Sunday night dinners! Break up the meat with a wooden spoon until it’s nicely crumbled and no pink remains.
- Step 2: Drain the excess grease (Grandma taught me to save a tiny bit for extra flavor) and stir in your taco seasoning. Add the tomatoes and let everything simmer for about 10 minutes while those flavors get happy together.
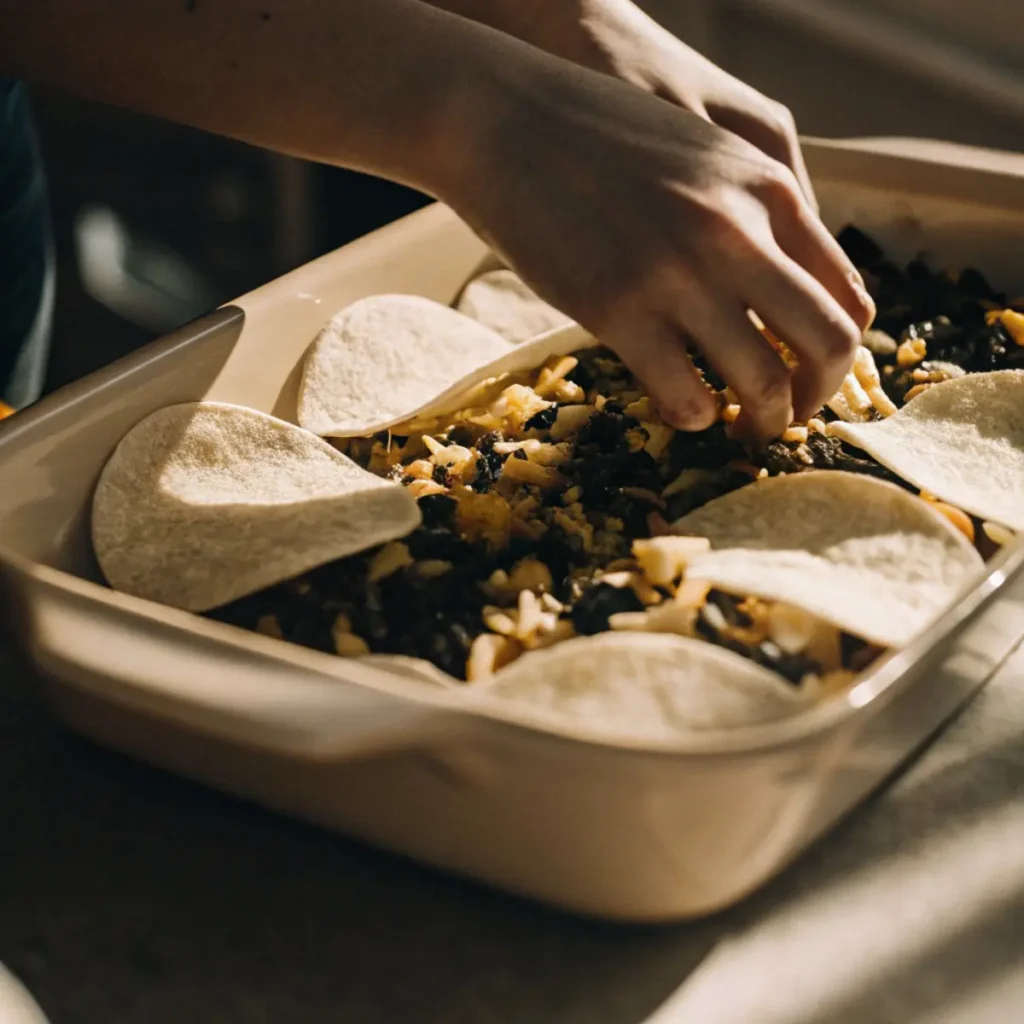
- Step 3: Layer up your magic! Start with tortillas at the bottom of your casserole dish – torn pieces work just fine. Add a layer of the meat mixture, beans, corn, and a generous handful of cheese. Repeat these layers until you run out of ingredients, ending with cheese on top.
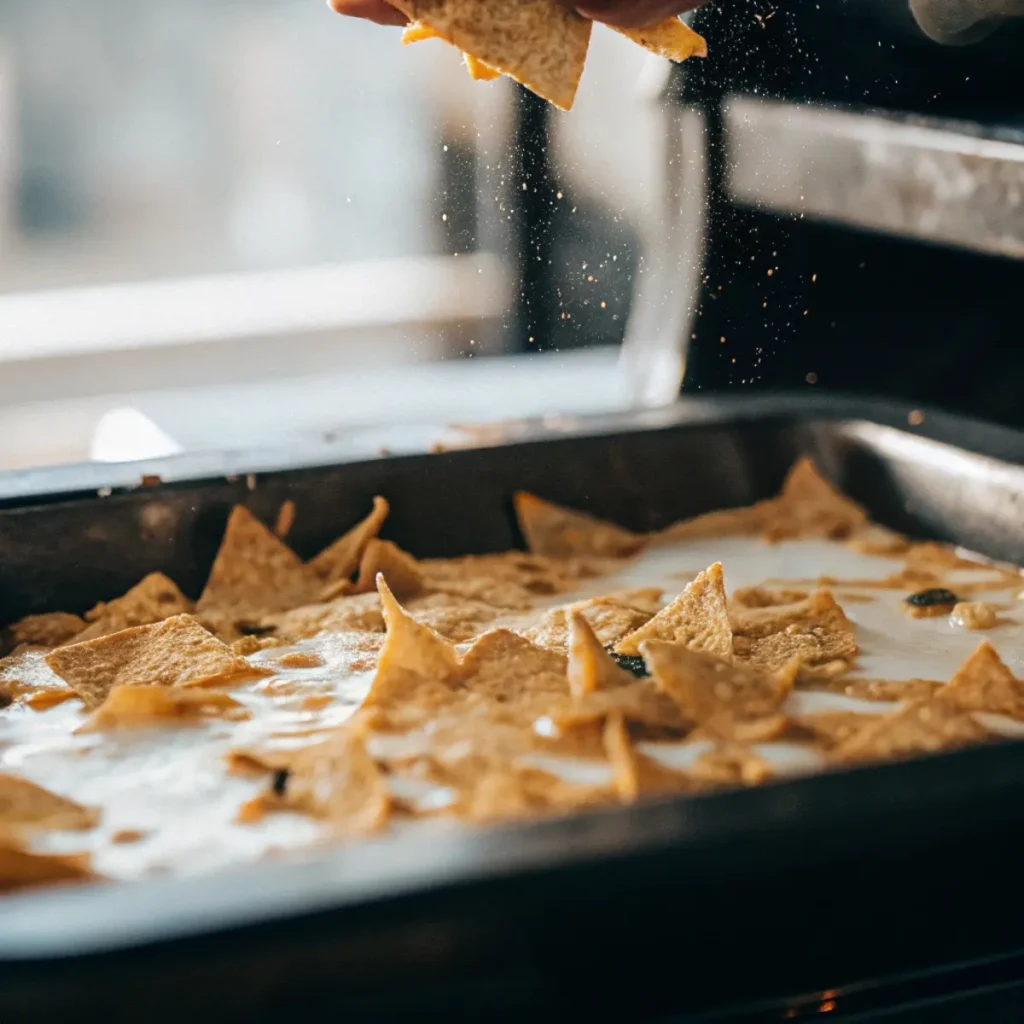
- Step 4: Crush those nacho chips all over the top layer. This is the “crunch” in our taco crunch casserole! Don’t be shy with them – that crispy topping is what makes this dish shine.
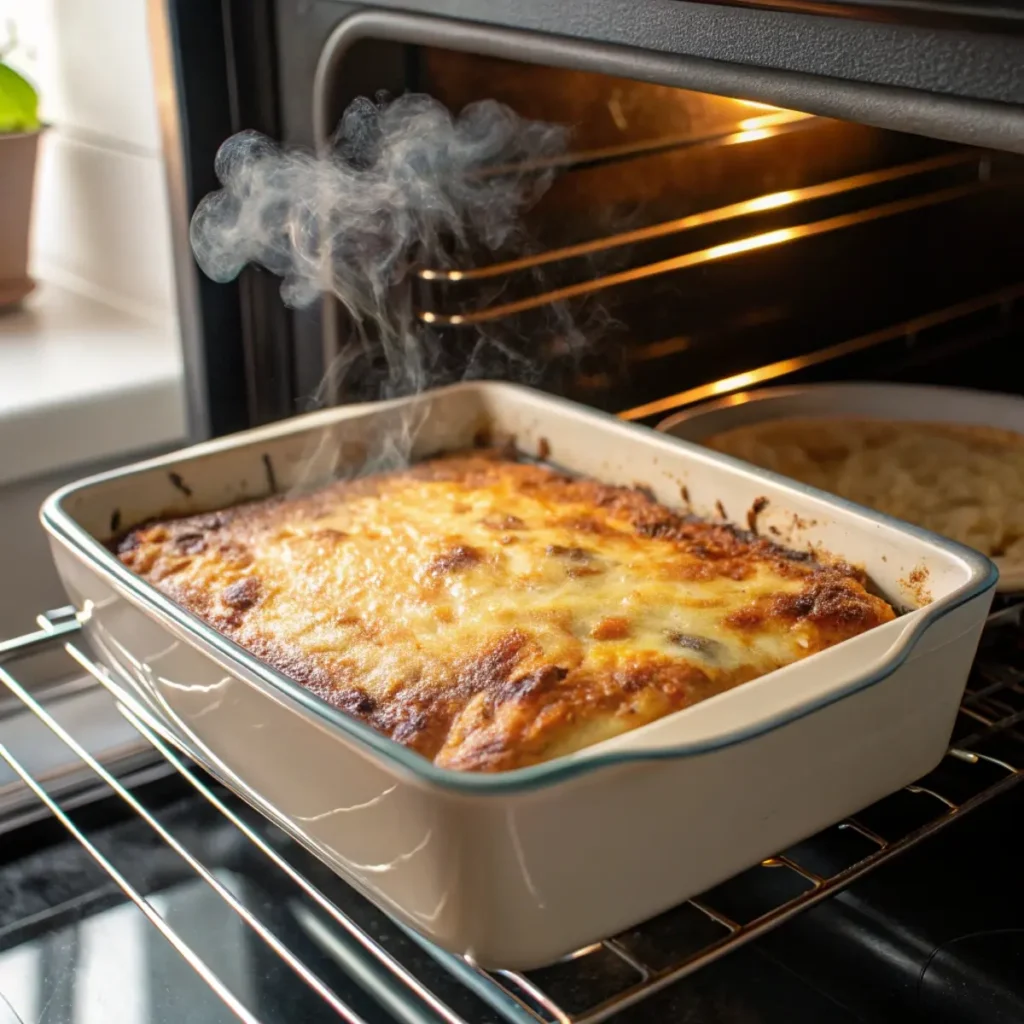
- Step 5: Bake at 350°F for 25-30 minutes until the cheese is bubbly and starting to brown at the edges. Let it rest for 10 minutes before diving in – trust me, that waiting period is crucial!
Hint: If you’re making this dump and bake taco casserole version, simply combine all the filling ingredients in your baking dish instead of cooking on the stovetop first. Just be sure to add 10-15 minutes to your baking time for thorough cooking!
Top Tip
After years of perfecting this recipe with Grandma (and yes, that includes the Great Taco Meat Burning Incident of 2015), I’ve discovered a few tricks that make all the difference. First, always taste your taco meat mixture before assembling – sometimes it needs a pinch more salt or a splash of lime juice to really sing! For the ultimate nacho chip casserole crunch, I wait until the last 10 minutes of baking to add those crushed chips. Otherwise, they can get soft and lose that satisfying texture we all love.
If you’re using fresh corn, give it a quick char in the skillet before adding to the layers – it adds this smoky sweetness that’s absolutely irresistible. And here’s Grandma’s golden rule: never skimp on the cheese between layers. “Cheese is the glue that holds family together,” she always says with a wink.
Personal Anecdote
I’ll never forget the Saturday when Grandma found me hiding a burned pan of taco casserole behind the garage. “Child, what in the world?” she exclaimed, her hand on her hip. I was 16 and determined to impress my first boyfriend with what was supposed to be an emily’s excellent taco casserole recipe. Instead, I’d created something closer to charcoal.
Grandma didn’t scold me – she just marched us back to the kitchen and said, “Every kitchen disaster is just practice for success.” As she guided me through making a new batch, she shared how she’d once served raw chicken to Great-Grandpa’s boss. “But look at me now!” she said, sprinkling cheese like a seasoned pro. That boyfriend didn’t last, but this recipe sure did. Now whenever I smell those spices hitting hot meat, I hear her voice: “Jasmine, sweetie, failure’s just the seasoning that makes victory taste better.”
Substitutions
Through my years of making this emily’s excellent taco casserole slow cooker version, I’ve discovered countless ways to adapt it for different dietary needs. For my gluten-free friends, swap those flour tortillas with corn tortillas – they actually add an authentic Mexican touch that Grandma says reminds her of her first trip to Cancun!
If you’re cooking vegetarian, black beans or lentils make excellent substitutes for the ground beef. I’ve also used plant-based crumbles with great success. For dairy-free folks, there are some fantastic cheese alternatives that melt beautifully – just make sure to get the ones specifically made for melting.
Want to cut back on carbs? Replace the tortillas with layers of thinly sliced zucchini or bell peppers. It won’t be quite the same taco casserole with tortillas, but it’s still incredibly delicious and satisfying!
Variations for Emily’s Excellent Taco Casserole
After making this emily’s excellent taco casserole recipe countless times, I’ve discovered some fantastic variations that keep dinner exciting! For a spicy kick, I fold in diced jalapeños and use pepper jack cheese instead of cheddar. My kids absolutely love when I create a “breakfast taco casserole” version with scrambled eggs and breakfast sausage for lazy Sunday mornings.
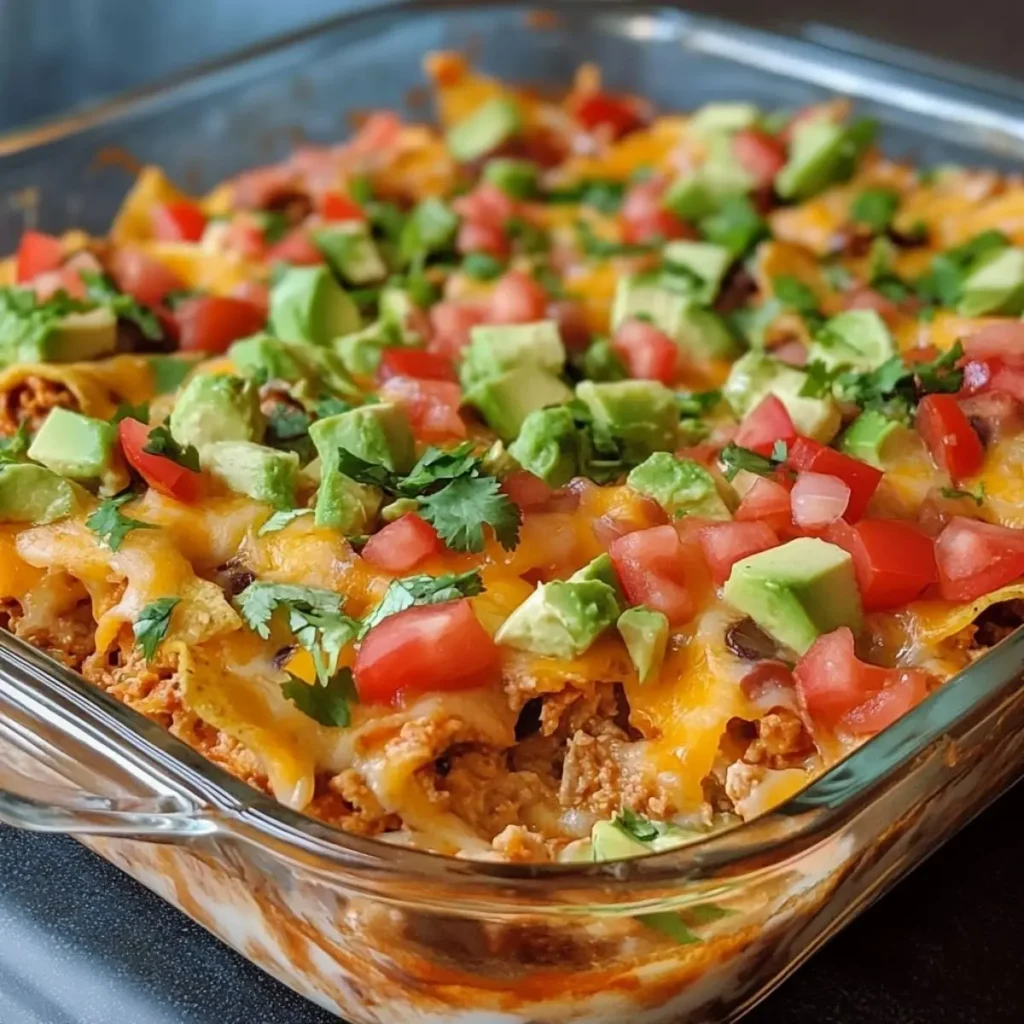
During potluck season, I make what Grandma calls “Fancy Nancy” style – topping it with fresh avocado slices, cilantro, and a drizzle of Mexican crema just before serving. It reminds me of how we elevate our White Chocolate Raspberry Poke Cake with fresh berries and cream – simple additions that make it extra special. Sometimes I’ll even create a coney casserole variation by adding hot dog slices and coney sauce to the mix (don’t knock it ’til you try it!).
For special occasions, I layer in roasted poblano peppers and use a blend of Mexican cheeses. And yes, I once made a bizarre but oddly delicious pineapple casserole 9×13 fusion by adding chunks of fresh pineapple – it gave the whole dish a sweet-and-spicy Hawaiian twist that had everyone asking for seconds!
Equipment
The right tools make all the difference when creating this mexican casserole masterpiece! My go-to is a deep 9×13 inch ceramic baking dish that Grandma gave me for my wedding. Ceramic heats more evenly than glass or metal, giving you that perfect golden-brown cheese top without burning the edges.
For the stovetop portion, I swear by my cast iron skillet – it browns the meat beautifully and adds this subtle depth of flavor you just can’t get from non-stick pans. If you’re using regular cookware, just make sure to adjust your heat down a notch to prevent sticking.
For crushing those nacho chips, skip fancy tools and use a rolling pin or even a wine bottle (my emergency method when I’m cooking at friends’ houses!). Place the chips in a sealed plastic bag first to avoid a mess. And don’t forget a good cheese grater – pre-shredded cheese has anti-caking agents that can prevent that perfect melty goodness we’re after!
Storage
This emily’s excellent taco casserole review wouldn’t be complete without proper storage tips! After countless family gatherings, I’ve mastered the art of keeping leftovers fresh. Store any remaining casserole in an airtight container in the fridge for up to 3-4 days. The key is to let it cool completely before covering – otherwise, you’ll get condensation that makes the tortillas soggy.
For reheating, skip the microwave if you can! Pop it back in a 350°F oven for about 15-20 minutes to maintain that crispy top layer. If you must microwave, place a damp paper towel over the portion to prevent the cheese from getting rubbery.
Surprisingly, this mexican casserole freezes beautifully! Wrap individual portions in plastic wrap, then aluminum foil, and freeze for up to 3 months. Just thaw overnight in the fridge before reheating. Pro tip: wait to add fresh toppings like sour cream and green onions until after reheating!
Grandma’s Secret for Emily’s Excellent Taco Casserole
The real magic behind this emily’s excellent taco casserole ingredients list? Grandma’s secret ingredient: a tablespoon of unsweetened cocoa powder in the meat mixture! “Just like the Mexican mole sauce,” she whispers every time she adds it. The cocoa deepens all those savory flavors without making it taste chocolatey.
She also taught me to always toast the taco seasoning in the hot pan for 30 seconds before adding liquid. “Wake up those spices, honey!” she’d say, stirring with her favorite wooden spoon that’s darkened from decades of use.
Her biggest secret? Layer a thin spread of refried beans on the bottom tortilla layer – it creates this creamy base that helps hold everything together. “Structure is everything in life and casseroles,” she always reminds me with that knowing smile that makes her eyes crinkle at the corners.
FAQ About Emily’s Excellent Taco Casserole
Can I make emily’s excellent taco casserole ahead of time?
Absolutely! I often assemble it the night before, cover it tightly, and refrigerate. Just add 10-15 minutes to the baking time since you’re starting cold. Wait to add the nacho chip topping until right before baking for maximum crunch. For another make-ahead option that’s always a hit, check out the original emily’s excellent taco casserole recipe on AllRecipes that inspired my grandmother’s version.
How do I make emily’s excellent taco casserole in a slow cooker?
For the slow cooker version, layer all ingredients except chips and cook on low for 4-6 hours. Add crushed chips and cheese in the last 30 minutes. The texture’s a bit different but still delicious!
What’s the best way to reheat leftover taco casserole?
For best results, reheat in a 350°F oven for 15-20 minutes. Cover with foil if the top starts browning too quickly. Add fresh nacho chips on top if needed!
Can I make this casserole spicier?
Yes! Add diced jalapeños, use spicy salsa, or sprinkle in some cayenne pepper with your taco seasoning. My brother-in-law adds hot sauce to each layer for extra kick!
Conclusion: Why Emily’s Excellent Taco Casserole is a Family Favorite
After making this emily’s excellent taco casserole recipe countless times over the years, I can honestly say it’s become more than just a meal – it’s a tradition. From those first kitchen disasters to now teaching my own kids how to layer ingredients just right, this dish continues to bring my family together around the table. The beauty of this recipe lies in its versatility and forgiveness; whether you’re a novice cook or a seasoned pro, it turns out wonderfully every time.
Remember, the secret isn’t just in following the recipe – it’s in adding your own touch of love (and maybe Grandma’s cocoa powder trick!). So next time you’re looking for a crowd-pleasing dish that’s both comforting and exciting, give this taco casserole with tortillas a try. Trust me, your family will be asking for seconds before they’ve finished their firsts!

Emily’s Excellent Taco Casserole
Equipment
- 1 9×13-inch baking dish Ceramic or glass preferred for even baking.
- 1 Cast iron skillet Gives the meat a beautiful browning.
- 1 Wooden spoon Grandma’s favorite tool for taco filling.
- 1 Cheese grater Freshly grated cheese melts better!
- 1 Mixing bowl For preparing the taco meat mixture.
Ingredients
- 1 lb ground beef Lean ground beef preferred.
- 1 yellow onion Diced small.
- 1 packet taco seasoning Toast in pan to deepen flavor.
- 1 can (14 oz) diced tomatoes Do not drain.
- 1 can (15 oz) black beans Drained and rinsed.
- 1 cup corn kernels Fresh, frozen, or canned.
- 6 flour tortillas Torn into pieces.
- 2 cups cheddar cheese Freshly grated melts best.
- 1 cup nacho chips Crushed for crunchy topping.
- 1 cup salsa Mild or spicy, your choice!
- ½ cup sour cream For garnish.
- ½ cup diced avocado Optional topping.
- ¼ cup chopped cilantro Optional, fresh garnish.
- 1 tbsp unsweetened cocoa powder Grandma’s secret ingredient!
Instructions
- In a large skillet, brown the [ground beef] with the diced [onion] over medium heat. Stir frequently, just like Grandma did, until the beef is fully cooked and the onions are softened
- Drain excess grease, leaving just a little behind for flavor (Grandma’s trick!). Stir in the [taco seasoning] and toast it in the hot pan for 30 seconds. Add the [diced tomatoes] and let everything simmer together for 10 minutes. Stir in the [cocoa powder] to deepen the flavor.
- In your greased [9×13-inch baking dish], layer torn [flour tortillas] across the bottom. Spoon over some of the meat mixture, then add [black beans], [corn], and a generous sprinkle of [cheddar cheese]. Repeat layers until ingredients are used up, finishing with cheese on top.
- Crush the [nacho chips] and scatter them across the top layer of cheese. This is the crunchy magic everyone fights over at the table
- Bake at 350°F (175°C) for 25–30 minutes or until the cheese is bubbling and starting to brown. Let it rest for 10 minutes before serving — Grandma always said, “Let the layers settle like stories in a good book.”
- Top with dollops of [sour cream], fresh [avocado], and a sprinkle of [cilantro]. Serve hot and watch your family come running like mine always did!
Notes
- For a vegetarian version, swap the ground beef for lentils or plant-based crumbles.
- Want it gluten-free? Use corn tortillas instead of flour.
- Add jalapeños for spice, or try pepper jack cheese for a zesty twist.
- Leftovers can be stored in the fridge up to 4 days or frozen in individual portions for up to 3 months.
- Reheat in the oven to restore that crunchy top layer.


3 thoughts on “Easy Emily’s Excellent Taco Casserole Recipe”