 Skip to content
Some of my happiest memories involve Grandma and me dancing around her sunny kitchen on Saturday mornings, turning simple ingredients into something special. Last spring, she showed up at my door with her favorite mixing bowl and announced, “Today, Jazzy, we’re creating breakfast magic!” We spent the morning experimenting with her classic breakfast muffin recipe, but when I suggested adding Bisquick to make it easier, her eyes lit up like Christmas morning. “You clever girl!” she laughed, giving me a flour-dusted hug.

These Bisquick sausage egg and cheese muffins were born from that joyful morning of mixing, tasting, and giggling together.
We must have made four different batches before getting it just right. I’ll never forget how we high-fived with oven-mitted hands when the final batch came out perfectly golden and puffy.
Now whenever I make these, I can still hear Grandma’s voice saying, “Sometimes the best recipes come from combining old wisdom with new tricks!”
They’ve become our special tradition. Every Sunday after church, we make a batch together while catching up on family gossip and sharing cups of coffee.
These muffins aren’t just breakfast; they’re little bundles of happiness that remind me of dancing with Grandma in a flour-dusted kitchen!
Jump To
Why You’ll Love These Bisquick Sausage Egg and Cheese Muffins
These savory breakfast muffins are everything you want in a morning meal: hearty, cheesy, and incredibly satisfying! The fluffy Bisquick base creates the perfect tender texture that holds together all those delicious ingredients. Each bite delivers a wonderful combination of savory sausage, creamy melted cheese, and fluffy egg that makes your taste buds do a happy dance.
What makes these truly special is how versatile they are. Pop them fresh from the oven for a warm breakfast, pack them for lunch, or reheat for a quick dinner. They’re freezer-friendly too, which means you can always have a homemade breakfast ready in minutes. Grandma calls them “morning insurance” because they guarantee everyone starts their day with a full belly and a smile!
Ingredients for Bisquick Sausage Egg and Cheese Muffins
Making these breakfast muffins is wonderfully simple with just a handful of pantry staples. The Bisquick mix does most of the heavy lifting, creating perfectly fluffy muffins every time without measuring multiple ingredients.
What You’ll Need
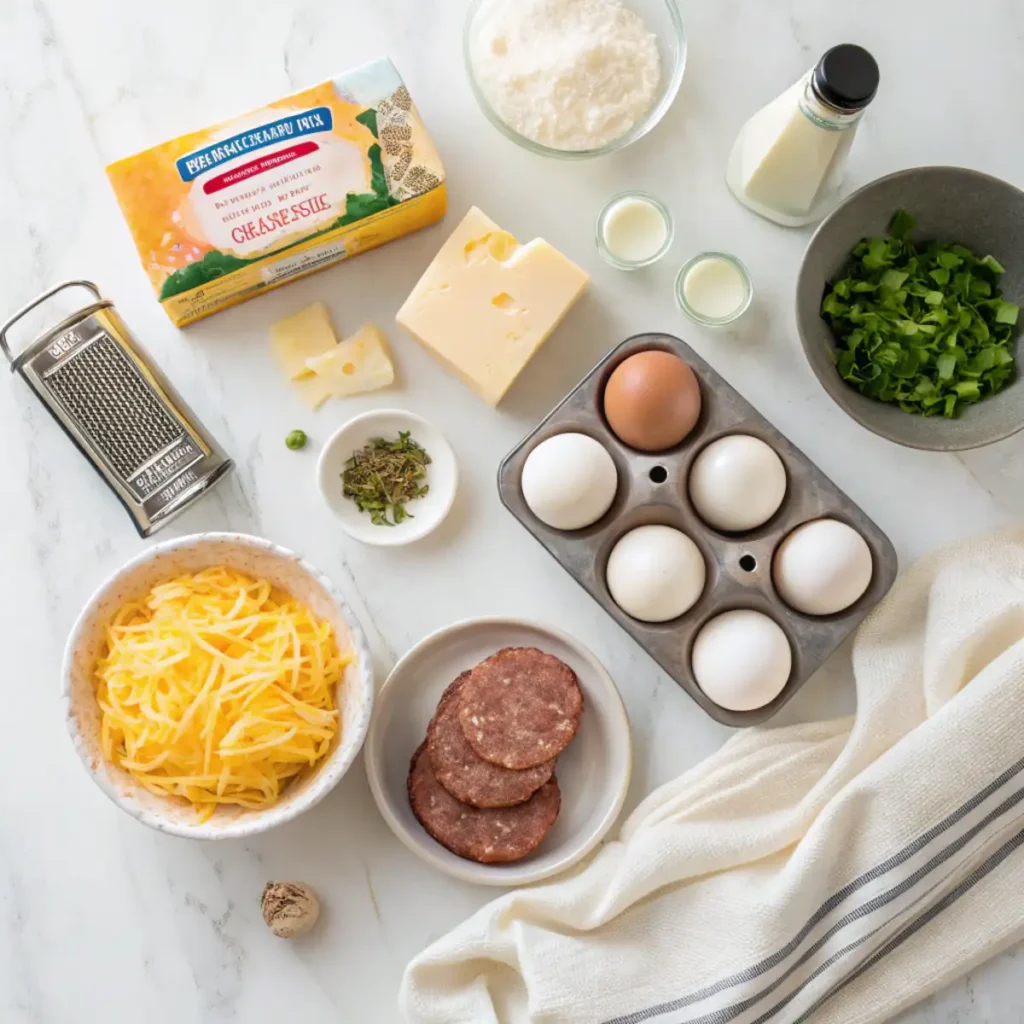
- Bisquick baking mix
- Jimmy Dean breakfast sausage (or your favorite brand)
- Sharp cheddar cheese, shredded
- Large eggs
- Milk
- Green onions (optional)
- Salt and pepper to taste
- Cooking spray for muffin tin
Why These Ingredients Matter
The Bisquick mix is the real hero here. It creates perfectly fluffy muffins without fussy measuring of flour and leavening agents. Jimmy Dean sausage brings that classic breakfast flavor everyone loves, while sharp cheddar adds just the right amount of richness without being greasy. The eggs serve double duty, both binding the muffins and adding protein power to keep you full. Fresh green onions are my little secret for brightening up the flavors, though Grandma sometimes uses chives from her garden instead. The combination creates muffins that are sturdy enough to grab-and-go but tender enough to melt in your mouth!
See recipe card for quantities.
Instructions for Making Bisquick Sausage Egg and Cheese Muffins
Step-by-Step Directions

- Step 1: Preheat your oven to 375°F and generously spray a 12-cup muffin tin with cooking spray.
- Step 2: In a large skillet over medium heat, cook and crumble 1 pound of breakfast sausage until browned and fully cooked. Drain excess grease and let cool slightly.
- Step 3: In a large mixing bowl, whisk together 2 cups of Bisquick mix, 6 beaten eggs, and 3/4 cup milk until just combined. Don’t overmix!
- Step 4: Fold in the cooked sausage, 1 1/2 cups shredded cheddar cheese, and 1/4 cup chopped green onions if using.

- Step 5: Season with a pinch of salt and pepper, then stir gently to distribute ingredients evenly.
- Step 6: Using a 1/3 cup measure or ice cream scoop, divide the batter evenly among the 12 muffin cups.
- Step 7: Bake for 18-20 minutes, or until the muffins are golden on top and a toothpick inserted in the center comes out clean.
- Step 8: Let cool in the pan for 5 minutes before removing to a wire rack.

Hint: For perfectly shaped muffins, Grandma taught me to give the pan a gentle tap on the counter after filling to remove air bubbles. Also, these muffins will puff up during baking but settle slightly as they cool. That’s totally normal! They’ll still be deliciously fluffy inside.
Top Tip
Never skip preheating your oven. These muffins need that immediate heat to rise properly! When cooking the sausage, don’t drain it too aggressively; a little fat helps keep the muffins moist. Mix your batter just until combined. Overmixing makes tough muffins. If your muffins are browning too quickly on top, tent with foil for the last 5 minutes. For extra cheesy muffins, sprinkle a bit of cheese on top before baking. And remember, these will puff up dramatically in the oven then settle as they cool. That’s perfectly normal! Test doneness by gently pressing the center; it should spring back when done.
Personal Anecdote
The recipe for these muffins came together during one of those classic “Mom moments” when nothing was going right. It was picture day at school, and all three kids needed different outfits, signed permission slips, and of course, breakfast.
In my frazzled state, I accidentally doubled the Bisquick but had already mixed in the eggs and milk. Panicking, I called Grandma, who calmly said, “Just add more sausage and cheese, Jazzy. Sometimes mistakes make the best recipes.” I threw in whatever sausage was left and extra cheese, crossing my fingers.
Those “accident muffins” turned out so incredibly fluffy and delicious that my picky middle child ate three! When Grandma tried one later, she declared, “See? The best recipes happen when you’re too busy to overthink them.” Now I always make them with that “accidental” extra Bisquick, and they come out perfect every time.
Substitutions for Bisquick Sausage Egg and Cheese Muffins
These muffins are super adaptable to whatever you have in your kitchen! Here are my tried-and-true substitutions:
Bisquick – No Bisquick? Mix 2 cups all-purpose flour with 1 tablespoon baking powder, 1/2 teaspoon salt, and 1/4 cup cold butter cut into the flour until crumbly.
Sausage – Turkey sausage, bacon, ham, or even crumbled veggie sausage work great. For vegetarian version, try sautéed mushrooms and bell peppers.
Cheese – Any melting cheese works! Try pepper jack for spice, Swiss for milder flavor, or mozzarella for extra stretch.
Milk – Use whatever you have: almond milk, oat milk, or even water in a pinch (though they’ll be slightly less rich).
Eggs – For egg allergies, use 1/4 cup Greek yogurt or sour cream per egg as a substitute.
Green Onions – Regular onions (use less), chives, or fresh herbs like parsley work wonderfully.
Variations on Bisquick Sausage Egg and Cheese Muffins
Transform these basic muffins into something special with these tasty variations:
Southwestern Style – Add diced jalapeños, use pepper jack cheese, and include 1/2 cup corn kernels. Top with salsa when serving.
Mediterranean – Replace sausage with crumbled feta and chopped spinach, add sun-dried tomatoes, and use Italian herbs.
Loaded Potato – Add 1 cup shredded hash browns to the batter and top with crispy bacon bits before baking.
Pizza Lovers – Use Italian sausage, add 1/2 cup mini pepperoni, and include Italian seasoning. Serve with marinara for dipping.
Veggie Packed – Add finely diced bell peppers, mushrooms, and spinach. Great for sneaking vegetables to picky eaters!
Spicy Chorizo – Use chorizo instead of breakfast sausage and add a dash of hot sauce to the batter.
Ham and Swiss – Replace sausage with diced ham and use Swiss cheese. Add a touch of Dijon mustard to the batter.
Equipment for Bisquick Sausage Egg and Cheese Muffins
You don’t need fancy equipment for these muffins, but having the right tools makes the process smoother:
A standard 12-cup muffin tin is essential. Metal works better than silicone for getting those crispy edges. Non-stick pans are great, but still use cooking spray for insurance.
For mixing, a large bowl and wooden spoon work perfectly fine, though I sometimes use my stand mixer on low speed to save my arm muscles.
An ice cream scoop or 1/3 cup measuring cup helps portion the batter evenly. This ensures all muffins bake at the same rate.
Cooling racks aren’t mandatory but help prevent soggy bottoms. In a pinch, just tip the muffins on their sides in the pan to cool.
For make-ahead convenience, muffin liners can be helpful, though these muffins release easily from a well-greased pan.
If you’re making double batches like I often do, having two muffin tins lets you bake everything at once instead of waiting between batches.
Storage Tips for Bisquick Sausage Egg and Cheese Muffins
These muffins are perfect for meal prep! Once completely cooled, store them in an airtight container in the refrigerator for up to 5 days. For best results, place a paper towel in the container to absorb excess moisture.
For freezing, wrap each muffin individually in plastic wrap, then place in a freezer bag. They’ll keep for up to 3 months. Label with the date and reheating instructions for busy mornings.
To reheat from the fridge, microwave for 30-45 seconds or until warmed through. From frozen, microwave on 50% power for 1-2 minutes, then full power for 30 seconds.
For oven reheating (which keeps them crispier), wrap in foil and warm at 350°F for about 10 minutes from the fridge or 20 minutes from frozen.
These muffins actually taste even better the next day as the flavors meld together! I often make them Sunday evening so they’re ready for the week ahead.
Pro tip: If you’re packing these for lunch, wrap while still slightly warm. They’ll be perfect room temperature by lunchtime.
Want more freezer-friendly breakfast ideas? My Frozen French Toast Sticks are another great option for busy mornings!
Grandma’s Secret for Bisquick Sausage Egg and Cheese Muffins
Grandma’s secret to the perfect breakfast muffins isn’t just about the ingredients. It’s about the timing. One lazy Sunday morning, I caught her doing something unusual while we were baking together.
“Jazzy, come here,” she whispered, even though we were alone in the kitchen. She had mixed all the wet ingredients in one bowl and all the dry in another, but instead of combining them right away, she let them both sit on the counter. “The secret is patience. Let the Bisquick rest for 10 minutes before you add the wet ingredients. It hydrates better and makes fluffier muffins.”
Then came her real trick: after mixing everything together, she covered the bowl and said, “Now we wait again. Just 5 minutes this time. The batter needs to wake up!” While we waited, she shared how she learned this during the war when ingredients were precious and every batch had to be perfect. “When you rush the batter, it gets tough. When you let it rest, it rewards you with tenderness.” Sure enough, those muffins were the lightest, fluffiest batch we’d ever made. Now I always build in Grandma’s “patience pauses,” and my muffins turn out perfectly every single time.

FAQ about Bisquick Sausage Egg and Cheese Muffins
How do you make sausage egg and cheese muffins with Bisquick?
Making these muffins is super simple! Cook and crumble your sausage first, then mix Bisquick, eggs, and milk in a bowl. Fold in the cooked sausage, shredded cheese, and optional green onions. Scoop into a greased muffin tin and bake at 375°F for 18-20 minutes until golden. The Bisquick does all the heavy lifting, creating perfectly fluffy muffins without measuring multiple ingredients!
How to make a sausage and egg muffin?
For basic sausage and egg muffins, brown your sausage and set aside. Beat eggs with milk, add your preferred seasonings, then fold in the cooked sausage. Pour into greased muffin cups and bake until set. Using Bisquick makes them extra fluffy and ensures they hold together perfectly for grab-and-go eating.
How to cook Jimmy Dean sausage egg and cheese English muffin?
While this recipe makes homemade muffins rather than English muffin sandwiches, you can create a similar experience! Make these Bisquick muffins, then slice them horizontally when cooled. For an extra indulgent treat, add an additional fried egg and cheese slice between the halves. Much better than store-bought!
How to make cheese egg muffins?
For simple cheese egg muffins, whisk eggs with milk, add shredded cheese and seasonings, then bake in muffin tins. Adding Bisquick to the mixture creates a heartier, more substantial muffin that’s perfect for breakfast. The Bisquick helps them rise beautifully and gives that satisfying, bread-like texture everyone loves.
For more protein-packed breakfast ideas, check out my Longhorn Parmesan Crusted Chicken. The leftovers actually make an amazing addition to breakfast scrambles!
Conclusion
These Bisquick sausage egg and cheese muffins have truly become the breakfast MVP in our house! Whether you’re rushing out the door on a Monday morning or enjoying a leisurely weekend brunch, these savory muffins deliver comfort and convenience in every bite. I love how they bring back memories of cooking with Grandma while solving our modern-day breakfast challenges.
If you enjoyed this grab-and-go breakfast idea, you might also love my Emily’s Excellent Taco Casserole for those nights when breakfast-for-dinner sounds perfect. And for more creative egg dishes, these Scrambled Egg Muffin Cups offer another delicious variation!
Happy baking, friends!
Let me know if these become your new favorite breakfast solution too!

Grandma’s Bisquick Sausage Egg and Cheese Muffins
Equipment
- 1 12-cup muffin tin Standard size, generously spray with cooking spray
- 1 Large skillet For cooking and crumbling the sausage
- 1 Large mixing bowl For combining ingredients
- 1 Cheese grater For freshly shredded cheese (tastier than pre-shredded)
- 1 1/3 cup measure or ice cream scoop For evenly portioning the batter
Ingredients
- 2 cups Bisquick baking mix The original mix, not the low-fat version
- 1 pound breakfast sausage Jimmy Dean or your favorite brand
- 1 1/2 cups sharp cheddar cheese Freshly shredded works best
- 6 large eggs Room temperature
- 3/4 cup milk Whole milk for best flavor
- 1/4 cup green onions Chopped, optional but adds nice flavor
- 1/4 teaspoon black pepper Freshly ground if possible
- 1 spray cooking spray For the muffin tin
Instructions
- Preheat your oven to 375°F and generously spray a 12-cup muffin tin with cooking spray. Grandma always said, ‘A well-greased pan is half the battle won!’ I once tried to skip this step thinking my non-stick pan would be fine, and ended up with muffins stuck so badly I had to serve them in pieces. Never again!
- In a large skillet over medium heat, cook and crumble the breakfast sausage until it’s nicely browned and no pink remains, about 6-7 minutes. Drain the excess grease and let it cool slightly. Grandma taught me to save a little of that flavorful grease – just a teaspoon – to add back into the batter. ‘That’s where the flavor lives, Jazzy!’ she’d say with a wink.
- In a large mixing bowl, whisk together 6 eggs and milk until well combined. Don’t overbeat – Grandma would count to thirty while whisking and then stop. She said over-beaten eggs make tough muffins. I learned this the hard way when I got distracted by a phone call and left the mixer running!
- Add the Bisquick baking mix to the egg mixture and stir just until combined. Remember what Grandma always said: ‘Mix it like you’re folding in a cloud – gentle and patient.’ The batter should still have a few small lumps. If you mix until it’s perfectly smooth, your muffins will be dense instead of fluffy.
- Gently fold in the cooked sausage, sharp cheddar cheese, green onions if using, and black pepper. This is where Grandma’s secret patience trick comes in – let the batter rest for 5 minutes after mixing. ‘The batter needs to wake up,’ she’d say. This little wait makes the muffins incredibly tender.
- Using a 1/3 cup measure or ice cream scoop, divide the batter evenly among the 12 muffin cups. They should be about 3/4 full. Give the pan a gentle tap on the counter to remove any air bubbles – another one of Grandma’s tricks for even baking.
- Bake for 18-20 minutes, or until the muffins are golden brown on top and a toothpick inserted in the center comes out clean. The muffins will puff up dramatically while baking – don’t worry, that’s normal! They’ll settle a bit as they cool.
- Let the muffins cool in the pan for 5 minutes before removing them to a wire rack. This resting time helps them set properly. Grandma always said, ‘Good things come to those who wait, but not too long when breakfast is involved!’ Serve warm and enjoy watching them disappear!


3 thoughts on “Easy Bisquick Sausage Egg and Cheese Muffins – Ready in 30 Minutes”