Looking for a showstopping dessert that looks like it came from a five-star restaurant but is secretly simple to make? You’ve found it! These Mini Crème Brûlée Cheesecakes are the definition of elegance made easy. With a silky-smooth cheesecake base and that signature torched sugar crust, you can impress your guests without spending hours in the kitchen. This is the perfect recipe for when you want something a little fancy, without the fuss.
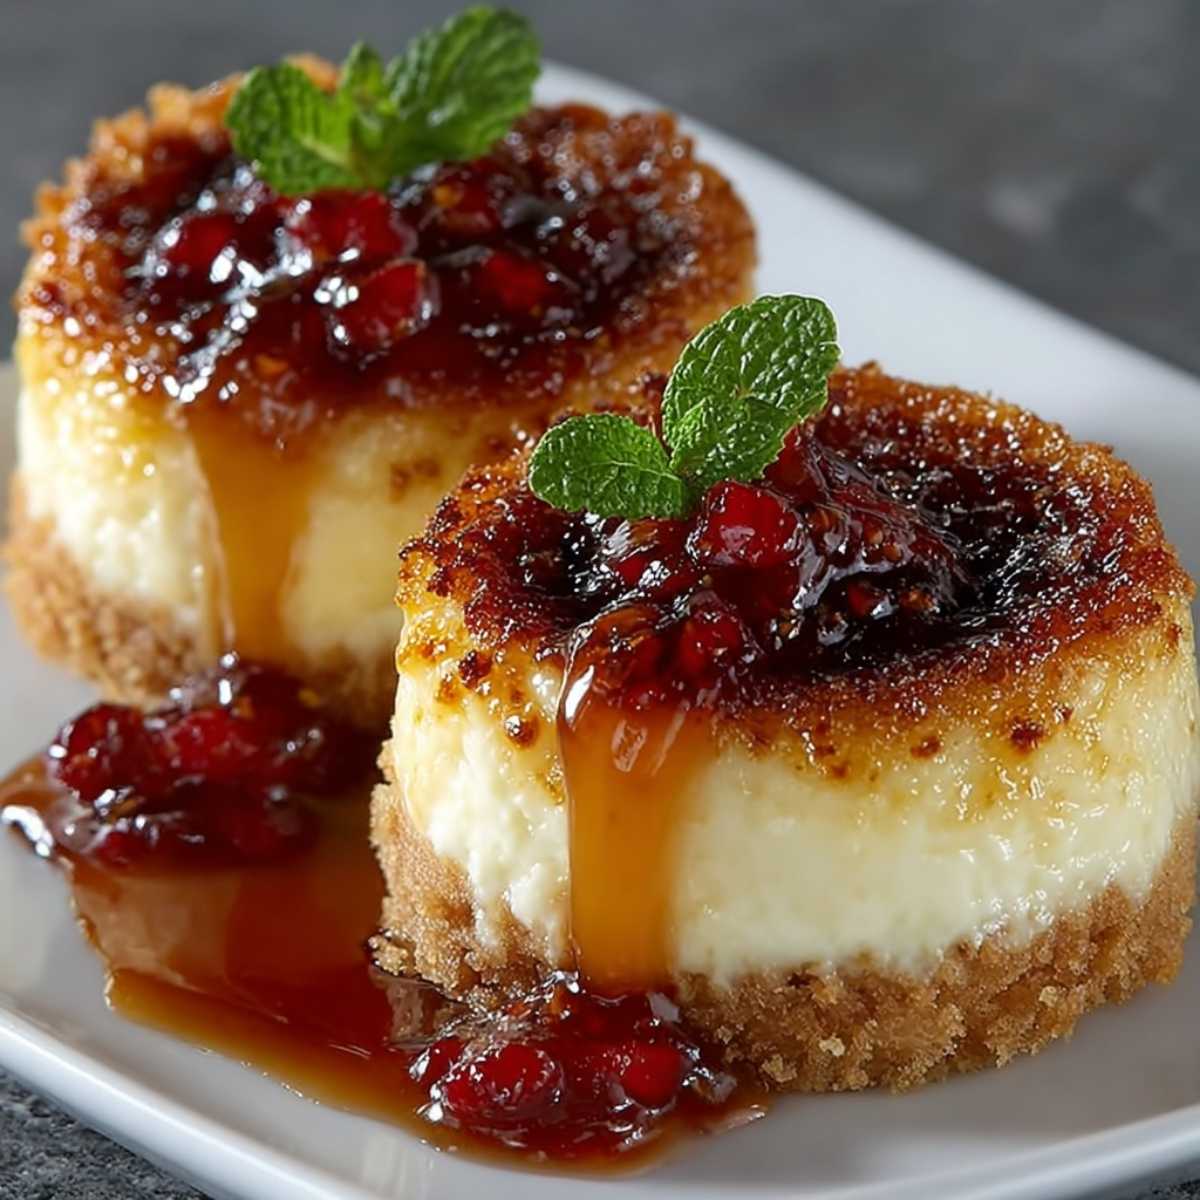
These irresistible mini crème brûlée cheesecakes bring together the best of both worlds in perfectly portioned servings that are ideal for entertaining. Make creme brulee cheesecake cupcakes with a graham cracker crust and custard-like cheesecake filling that delivers restaurant-quality results with surprisingly manageable home kitchen techniques.
Jump To
Why You’ll Love This Easy Mini Crème Brûlée Cheesecakes
These crème brûlée cheesecake cupcakes offer that perfect balance of familiar comfort and elegant sophistication that makes every bite feel like a special occasion. The rich creamy custard texture combined with the dramatic crunchy brûlée layer creates an incredible contrast of textures that keeps every spoonful interesting and satisfying. Each mini cheesecake bite delivers the smooth cream cheese filling we all crave, enhanced with vanilla bean paste for that authentic French pastry depth of flavor.
What really sets these best mini crème brûlée cheesecakes apart is how they solve the intimidation factor of both traditional cheesecake and classic crème brûlée while maintaining all the flavors and presentation appeal we associate with fine dining desserts. These tiny cheesecakes are perfect for portion control, elegant presentation, and easy serving at dinner parties. The water bath baking technique ensures that silky texture, while the individual format means no worrying about perfect slicing or serving logistics.
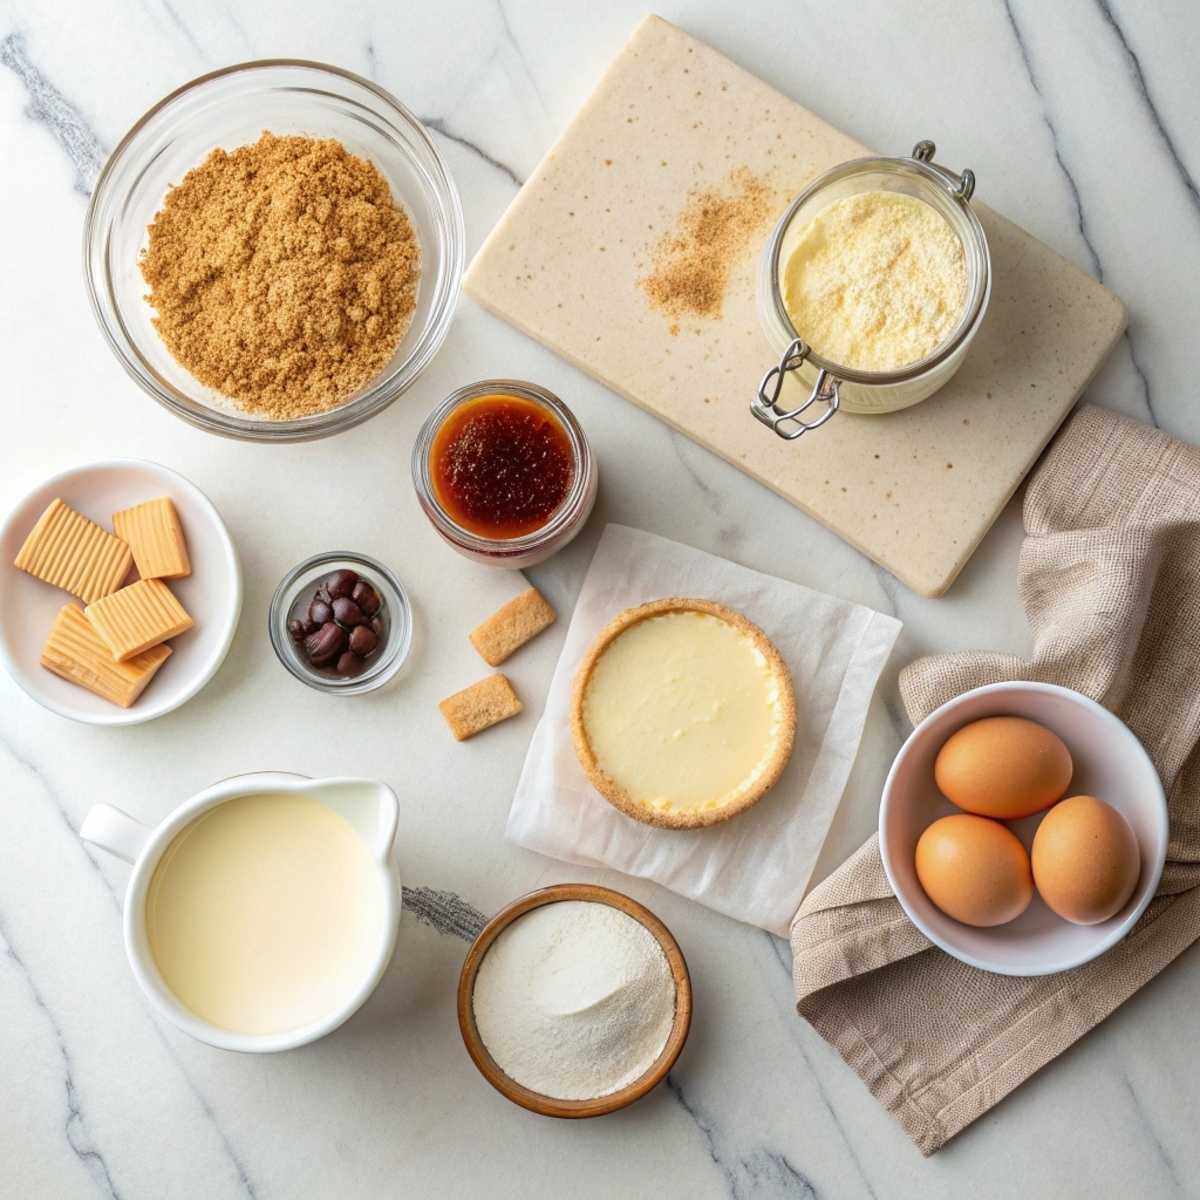
Ingredients for Mini Crème Brûlée Cheesecakes
This mini crème brûlée cheesecakes recipe focuses on premium ingredients that create authentic French pastry flavors in convenient individual portions. The key is using real vanilla bean paste and quality cream cheese for that signature taste and texture.
What You’ll Need
For the Graham Cracker Crust:
- 1 cup graham cracker crumbs
- 3 tablespoons melted butter
- 2 tablespoons granulated sugar
- Pinch of salt
For the Cheesecake Filling:
- 16 oz cream cheese, softened
- 1/2 cup granulated sugar
- 2 large eggs
- 1/4 cup heavy cream
- 1 teaspoon vanilla bean paste
- Pinch of salt
For the Brûlée Topping:
- 6 tablespoons granulated sugar (for caramelizing)
- Fresh berries for garnish (optional)
Why These Ingredients Matter
Room temperature cream cheese is absolutely crucial – cold cream cheese will create lumps no matter how long you mix it. Vanilla bean paste provides that authentic speckled appearance and intense flavor that makes these taste professionally made. Heavy cream adds richness without making the texture too dense. The graham cracker crust provides textural contrast and keeps the individual portions structurally sound. Quality ingredients make all the difference when you’re working with such simple, elegant flavors.
Instructions for Making Mini Crème Brûlée Cheesecakes
Step-by-Step Directions
Step 1: Preheat oven to 325°F and line a 12-cup muffin tin with paper liners or grease thoroughly.
Step 2: Combine graham cracker crumbs, melted butter, sugar, and salt. Press mixture firmly into bottom of each muffin cup.
Step 3: Bake crusts for 5 minutes, then remove and set aside. Reduce oven temperature to 300°F.
Step 4: Beat cream cheese and sugar until smooth and fluffy, about 3 minutes, scraping bowl frequently.
Step 5: Add eggs one at a time, beating just until incorporated – don’t overmix.
Step 6: Mix in heavy cream, vanilla bean paste, and salt until just combined.
Step 7: Divide filling evenly among prepared cups, filling about 3/4 full.
Step 8: Place muffin tin in a larger roasting pan and add hot water halfway up the sides of the tin.
Step 9: Bake in water bath for 18-22 minutes until centers are almost set but still slightly jiggly.
Step 10: Cool completely, then refrigerate for at least 4 hours or overnight.
Step 11: Before serving, sprinkle 1/2 tablespoon sugar over each cheesecake and caramelize with a kitchen torch until golden brown.
Step 12: Serve immediately after brûléeing for the best textural contrast.
Hint: The water bath is essential for preventing cracks and ensuring that silky smooth texture that makes these special. Don’t skip this step! Also, make sure your torch creates an even caramelization – move it constantly to prevent burning. For another elegant individual dessert, try this honeycomb cheesecake cake when you want something equally impressive.
Top Tip
The secret to perfect mini crème brûlée cheesecakes is temperature control throughout the entire process. Low and slow baking prevents the custard from curdling or cracking, while the water bath provides gentle, even heat. Don’t overbake – the centers should still have a slight jiggle when you remove them from the oven as they’ll continue cooking from residual heat.
Let them chill completely before attempting the brûlée step – the contrast between the cold custard and hot caramelized sugar is part of what makes this dessert so special. Work quickly when torching and serve immediately after caramelizing for that perfect textural contrast. For another dessert that celebrates vanilla flavors beautifully, these vanilla French beignets offer similar elegant French inspiration.
My Mini Crème Brûlée Cheesecakes Story
I’ll never forget the first time I attempted traditional crème brûlée for a dinner party – the custard split, the caramel burned, and I ended up serving store-bought dessert with a sheepish smile. But I was determined to master that perfect combination of creamy custard and crackling caramelized sugar, so I kept experimenting until I found a way to make it more approachable.
The breakthrough came when I realized I could combine the flavors I loved about crème brûlée with the more forgiving techniques of cheesecake making. Grandma watched me torch my first successful batch and said, “Jazzy, sometimes the best solutions come from taking what scares you and making it your own.” She was absolutely right, and these individual treats have become my signature dessert for special occasions.
Substitutions for Mini Crème Brûlée Cheesecakes
If you need to adapt this mini creme brûlée cups recipe for different needs, here are swaps that work well:
- Vanilla bean paste – pure vanilla extract works but use 2 teaspoons for similar flavor intensity
- Graham cracker crust – vanilla wafer crumbs or digestive biscuits create different but delicious bases
- Heavy cream – half-and-half works but the texture will be slightly less rich
- Cream cheese – mascarpone creates an even silkier texture though flavor will be milder
- Granulated sugar – superfine sugar caramelizes more evenly for the brûlée topping
The beauty of individual desserts is how they allow for customization while maintaining that elegant presentation. For another treat that plays with textures beautifully, this pineapple dump cake recipe offers different but equally satisfying contrast.
Variations on Mini Crème Brûlée Cheesecakes
This creme brulee cheesecake base is perfect for so many delicious variations:
- Chocolate Version – add melted dark chocolate to the filling for decadent richness
- Lemon Twist – add lemon zest and juice for bright citrus notes
- Coffee Infused – add espresso powder for sophisticated mocha flavors
- Seasonal Berry – fold in pureed strawberries or raspberries for fruity variations
- Lavender Honey – add food-grade lavender and honey for Provence-inspired elegance
- No-Bake Version – for mini crème brûlée cheesecakes no bake, use gelatin-set filling
Each variation keeps that signature brûlée topping while giving you different flavor profiles for any season or occasion.
Equipment for Mini Crème Brûlée Cheesecakes
The right tools make this personal cheesecake project so much easier:
- 12-cup muffin tin – essential for proper individual portion sizing
- Kitchen torch – absolutely crucial for authentic brûlée caramelization
- Large roasting pan – for the water bath that ensures smooth texture
- Stand mixer or hand mixer – for perfectly smooth, lump-free filling
- Fine-mesh sieve – helpful for straining filling if you want ultra-smooth results
If you don’t have a kitchen torch, you can use the oven broiler, but watch very carefully as it’s easy to burn the sugar under such intense heat.
Storage Tips for Mini Crème Brûlée Cheesecakes
These chilled overnight dessert treats store beautifully for entertaining:
- Pre-brûlée storage – refrigerate covered for up to 3 days before caramelizing
- Post-brûlée serving – serve within 30 minutes of torching for best texture
- Freezing option – freeze without brûlée topping for up to 1 month
- Make-ahead strategy – complete everything except final caramelization up to 2 days ahead
- Individual wrapping – perfect for portion control and gift giving
The beauty of these individual desserts is how they simplify both storage and serving logistics for entertaining.
Grandma’s Secret for Mini Crème Brûlée Cheesecakes
Grandma always strains her cheesecake filling through a fine-mesh sieve before pouring it into the cups to ensure the silkiest possible texture. “Jazzy, taking that extra minute to strain out any lumps is what separates good from extraordinary,” she’d say while patiently working the mixture through the mesh.
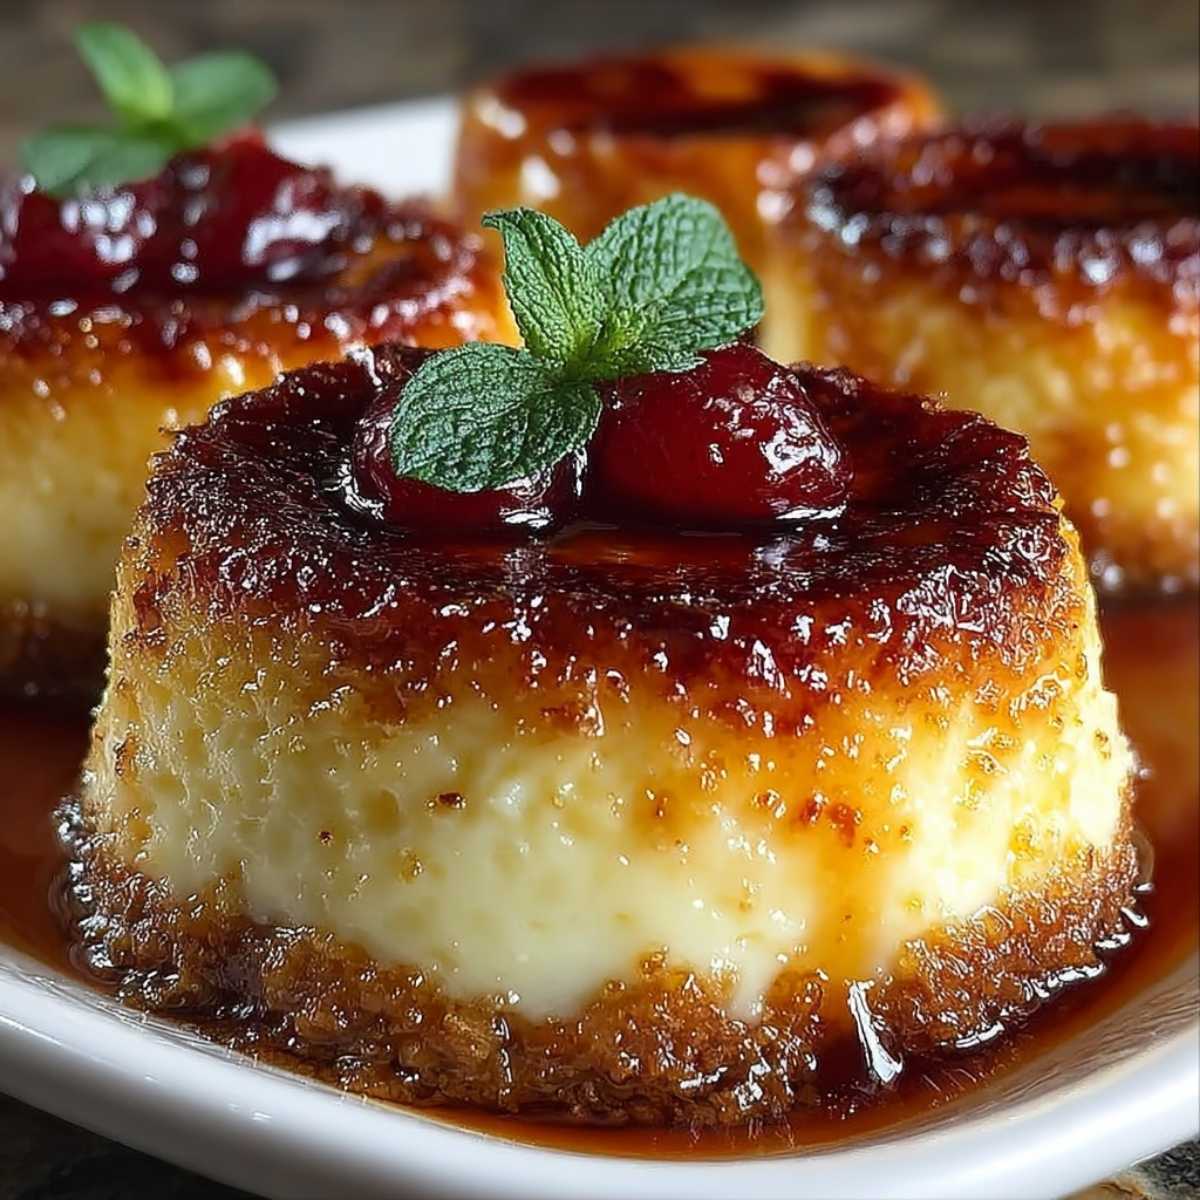
Look at these gorgeous individual cheesecakes with their perfectly caramelized tops – pure French patisserie elegance in convenient personal portions!
FAQ about Mini Crème Brûlée Cheesecakes
What is the secret to a creamy crème brûlée?
The secret is gentle, even cooking in a water bath and not overbaking. The custard should still jiggle slightly in the center when removed from the oven. Quality ingredients and proper technique create that signature silky texture.
Is crème brûlée just custard and sugar?
Traditional crème brûlée is essentially a rich custard made with cream, egg yolks, sugar, and vanilla, topped with caramelized sugar. This recipe adds cream cheese for cheesecake richness while maintaining those classic flavors.
What are some common mistakes when making crème brûlée?
Common mistakes include cooking at too high temperature (causes curdling), overbaking (creates rubbery texture), and not using a water bath (leads to uneven cooking and cracking).
What type of cream is best for crème brûlée?
Heavy cream with at least 35% fat content works best for rich, smooth texture. Lower fat creams won’t set properly or provide that luxurious mouthfeel that defines great crème brûlée.
Conclusion
Who knew something so elegant could be so easy to create in your own kitchen? This recipe proves that you don’t need to be a pastry chef to make a truly impressive dessert. For another elegant dessert that’s equally impressive, try this strawberry shortcake recipe when you want classic American charm. If you’re looking for more individual dessert inspiration, these mini cheesecakes offer additional techniques and flavor combinations to explore.
Keep this one in your back pocket for birthdays, holidays, or any time you need a guaranteed hit. We can’t wait to see your beautiful creations!
Grandma’s Mini Crème Brûlée Cheesecakes
Equipment
- 1 12-cup muffin tin Standard size is perfect.
- 1 Large roasting pan Must be larger than the muffin tin to hold the water bath.
- 1 Kitchen torch Essential for that authentic, crackly brûlée top.
- 1 Electric or Stand Mixer Grandma swore by her stand mixer, but a hand mixer works just fine.
- 12 Paper liners Optional, but makes cleanup much easier.Export to Sheets
Ingredients
For the Graham Cracker Crust:
- 1 cup graham cracker crumbs About 7-8 full sheets.
- 3 tablespoons butter, melted Unsalted is best.
- 2 tablespoons granulated sugar Just a touch for sweetness.
- 1 pinch salt
For the Cheesecake Filling:
- 16 oz cream cheese Softened to room temperature. This is non-negotiable!
- 1/2 cup granulated sugar
- 2 large eggs Room temperature, please.
- 1/4 cup heavy cream For that extra rich, luscious texture.
- 1 teaspoon vanilla bean paste You can see the little specks, just like Grandma's.
- 1 pinch salt Balances the sweetness.
For the Brûlée Topping:
- 6 tablespoons granulated sugar For caramelizing.
Instructions
- First things first, let's get the oven ready. Preheat it to 325°F (163°C) and pop some paper liners into your muffin tin. In a small bowl, mix together the [graham cracker crumbs], melted [butter], 2 tablespoons of [granulated sugar], and a [pinch of salt]. Grandma always said, "A good dessert needs a sturdy foundation, Jazzy," so press this mixture firmly into the bottom of each cup.
- Pop the pan into the oven and bake the crusts for just 5 minutes. This little step is Grandma's secret to making sure the crust stays crisp and doesn't get soggy. Once done, take them out and turn the oven temperature down to 300°F (150°C).
- In your mixer bowl, beat the softened [cream cheese] and 1/2 cup of [granulated sugar] until it's completely smooth and fluffy, which takes about 3 minutes. Scrape down the sides of the bowl often. Grandma would always tap the bowl and say, "Make sure everyone's invited to the party, dear. No lumps allowed!"
- Add the [eggs] one at a time, mixing on low speed just until the yellow disappears. "Be gentle now," Grandma would whisper, "you're just introducing them, not trying to wrestle them." Over-mixing at this stage makes for tough cheesecakes. Gently stir in the [heavy cream], [vanilla bean paste], and a [pinch of salt] until everything is just combined.
- Divide the filling evenly among your prepared cups. They should be about 3/4 full. Place the muffin tin inside your larger roasting pan. Now, carefully pour hot water into the roasting pan until it comes about halfway up the sides of the muffin tin. This is the water bath—Grandma called it a "spa day for the cheesecakes" to keep them moist and prevent cracks.
- Carefully place the whole setup in the oven and bake for 18-22 minutes. You'll know they're ready when the edges are set, but the centers still have a slight jiggle. That little wobble means the inside is perfectly tender and creamy.
- Let the cheesecakes cool completely in the pan before moving them to the refrigerator. "Patience is the hardest but most important ingredient," Grandma always reminded me. Let them chill for at least 4 hours, or even overnight, to let the flavors meld and the texture set perfectly.
- This is the magic moment! Just before you're ready to serve, sprinkle about 1/2 tablespoon of [granulated sugar] evenly over each chilled cheesecake. Using your kitchen torch, caramelize the sugar until it's a beautiful, deep amber brown. The sound of the sugar crackling was my favorite part as a kid. Serve them right away to get that incredible contrast between the warm, crunchy top and the cool, creamy cheesecake.
Notes
- The Water Bath is Key: Don’t skip this step! It’s the secret to a silky, crack-free cheesecake texture.
- No Vanilla Bean Paste? You can substitute with 1 1/2 teaspoons of pure vanilla extract, but you’ll miss those beautiful vanilla specks.
- Make-Ahead Tip: These are perfect for making ahead. You can bake and refrigerate the cheesecakes for up to 3 days. Just wait to do the brûlée topping until right before serving.
- Grandma’s Extra-Smooth Secret: For the absolute silkiest filling, Grandma would pour the batter through a fine-mesh sieve before filling the cups. It’s an extra step, but it guarantees a flawless texture.